The Historian Query Configurator
When connecting to Wonderware Historian Server, the Historian query is configured using the graphical user interface described below.
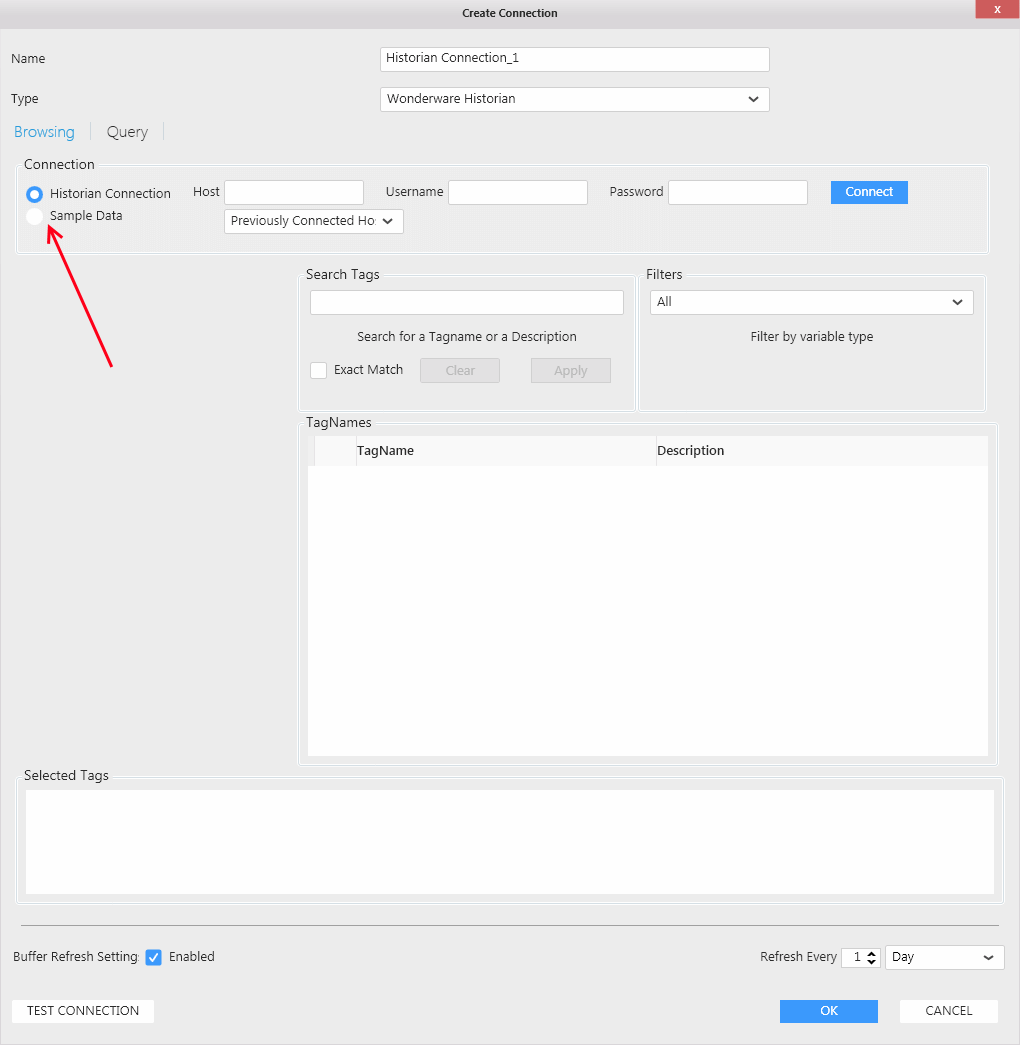
Connect to Wonderware Historian Server or use Sample Data
You can choose if you want to connect to a Wonderware Historian Server or if you want to test the connector using Sample Data by clicking on the radio button shown below
Note
You don’t need to have
Wonderware Historianinstalled when you setSample DataConnection
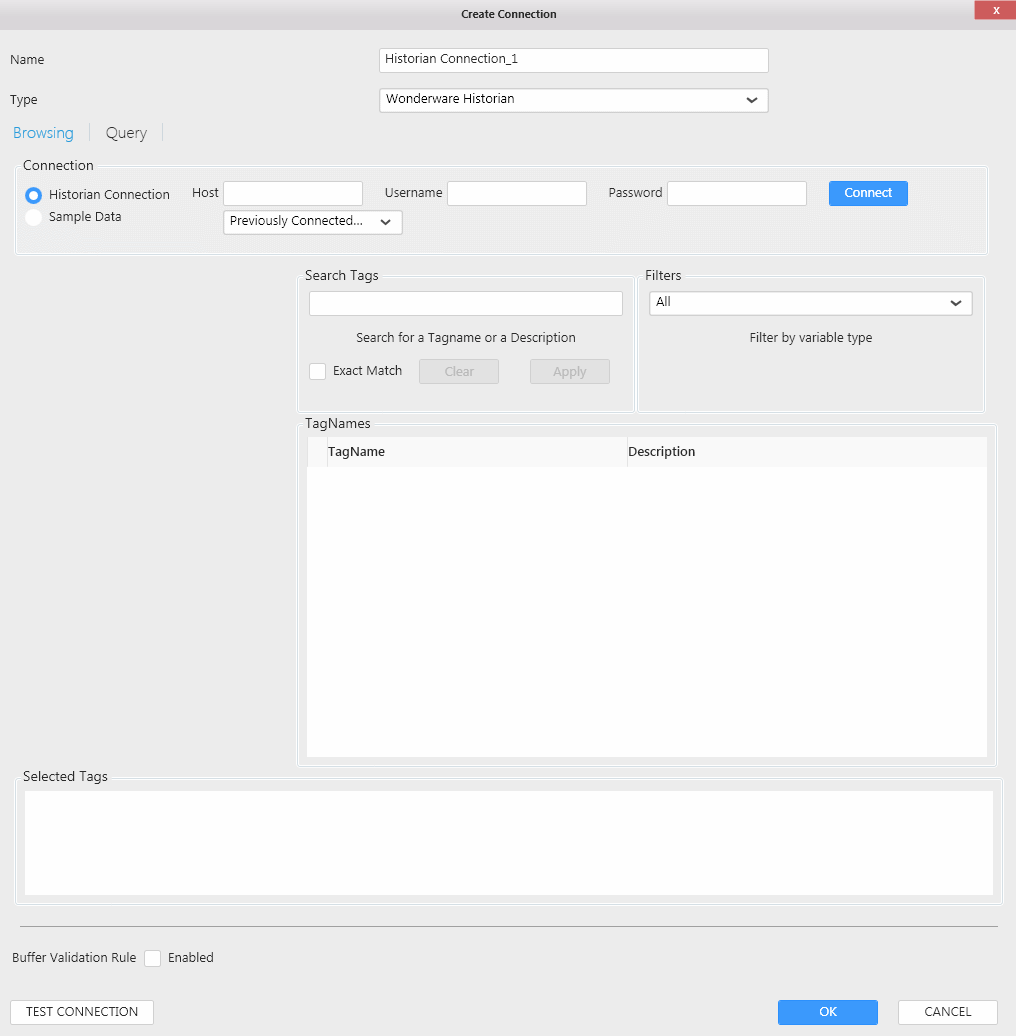
To connect to a Wonderware Historian Server the following fields need to be fill:

- Host : please enter the IP address of the server
- Username: The Username used in the SQL Server Database configured with Wonderware Historian.
- Password: The Password used with that account.
Important
Because the
Historian Connectorcan connect to any server regardless if it is a local server or not, you need to specify aSQL Server account typeto connect to theRuntime Database.
If in the current session you have already connected to a Historian server, you can select it in the combobox below to auto-fill the Host Input

when all fields are filled, please click on the Connect to Historian Button below.

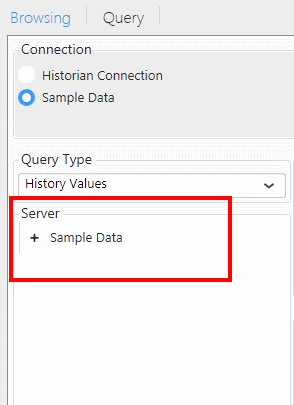
Browsing Groups
Once connected, the browsing panel will be available. You can choose to connect to a Wonderware Historian Server or local Sample Data mode.
Important
If you connect to a fresh install of
Wonderware HistorianServer, you will have to use firstQueryorTrendsoftware once, otherwise tags won’t be available for browsing
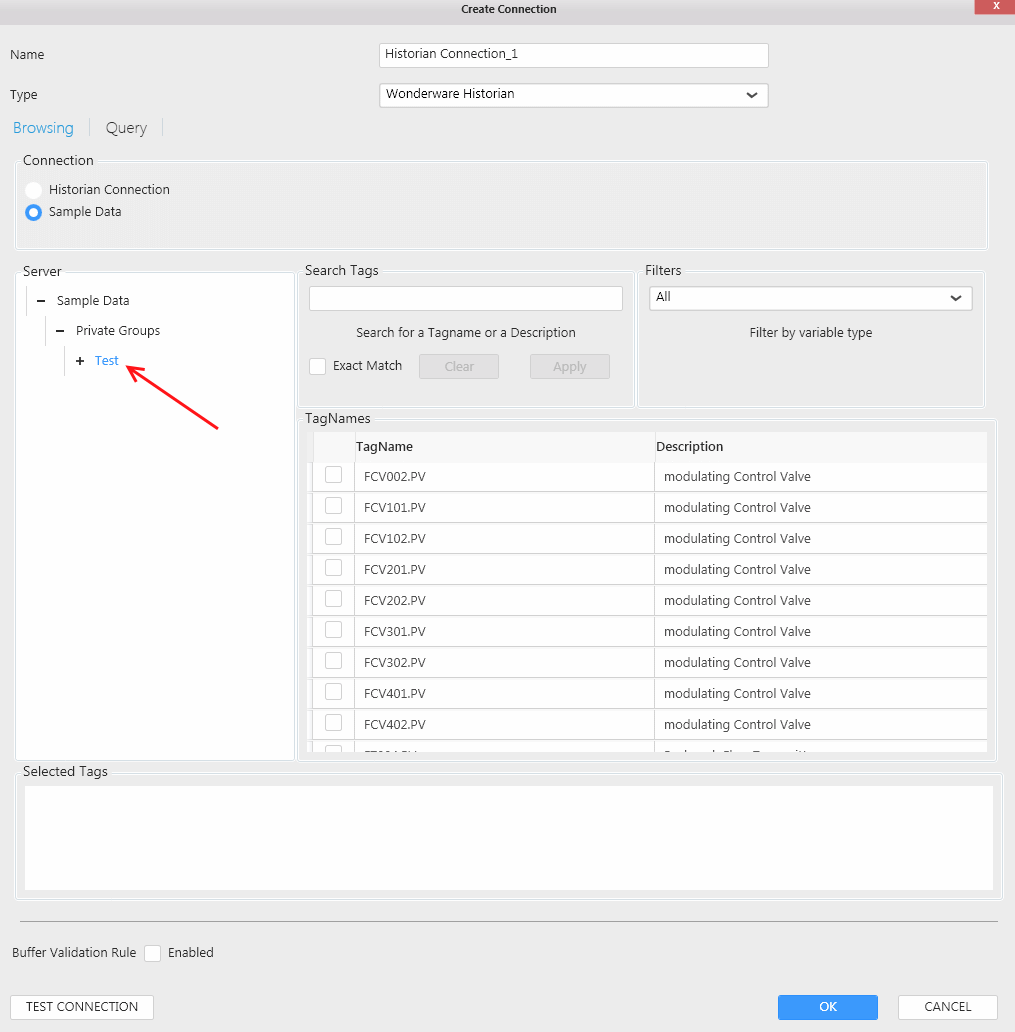
You can select the tags by clicking on the browser panel on Private Groups for example like the next screen.
Note
When you connect to a
Wonderware Historian Serveryou can select all tags by clicking on theAll Analog TagsNode
you can select pour preferred Group Tag by rolling down the list and select the group you want.
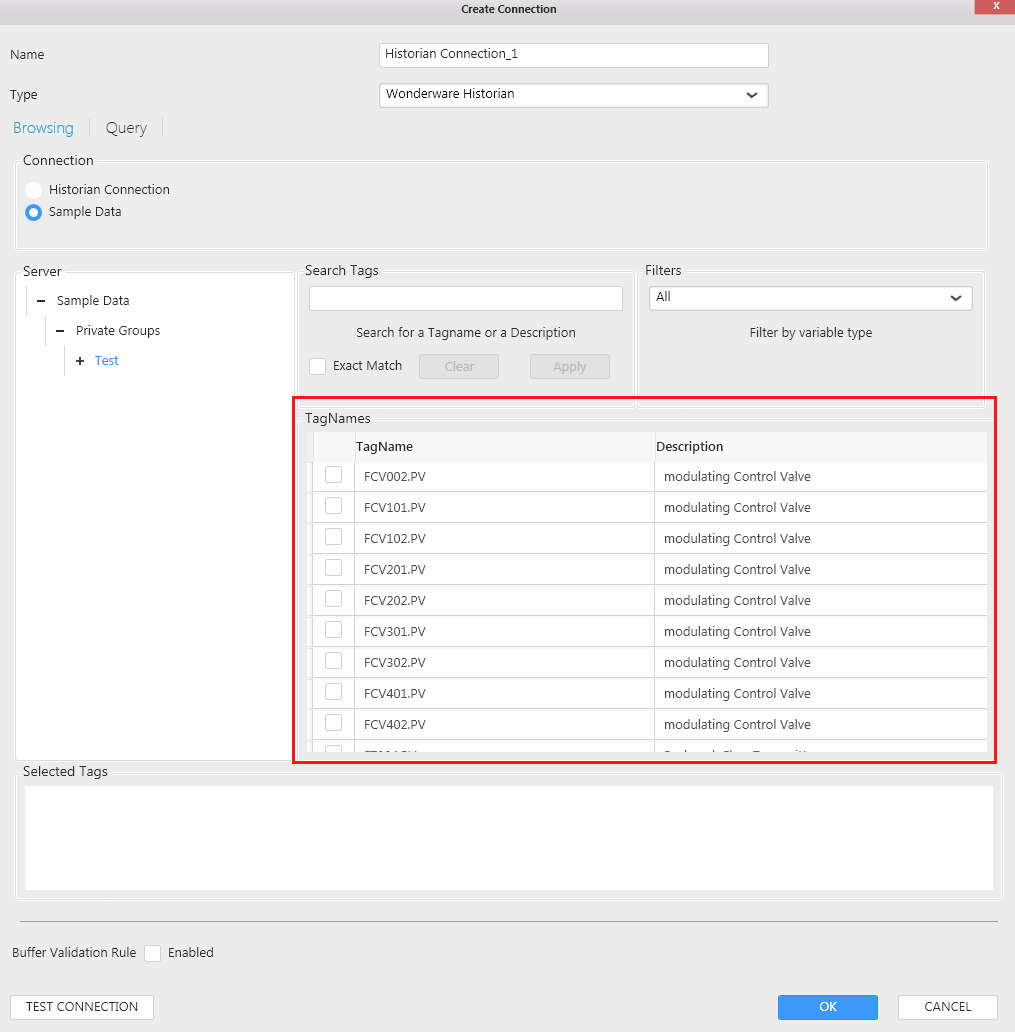
Then, The TagNames appears right left pane like below.
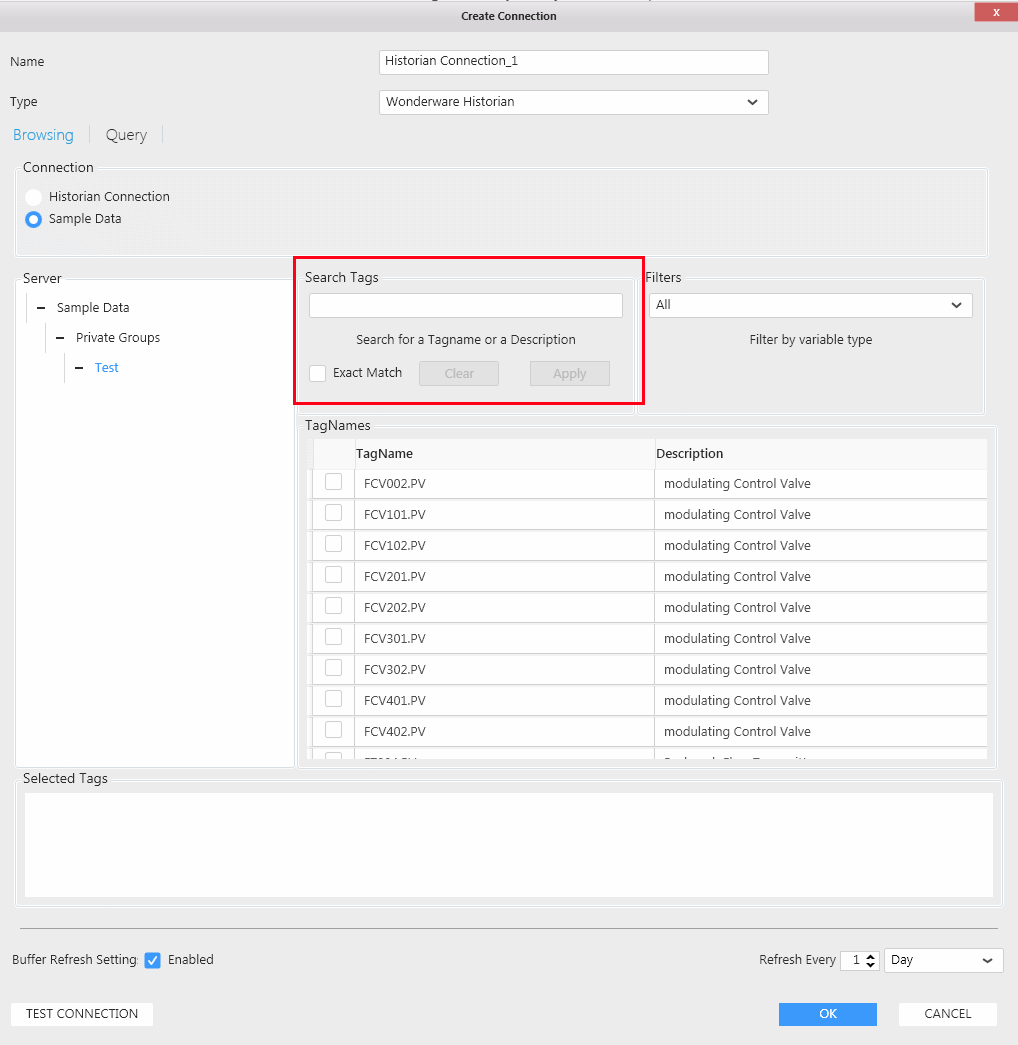
Search for a Tagname
You can search for a tagname by entering the Tagname on the search text box below.
The search result is immediately shown like below
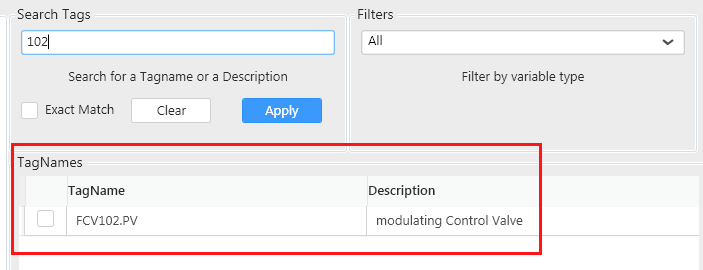
There is an optional parameter: Exact Match. By default, it is not checked, but if you check it will perform an Exact Match search.
Then after clicking to the apply button or return key button, the result appears in the list if any matched Tag were found.
You can clear the search filter by clicking on Clear Button like below.
![]()
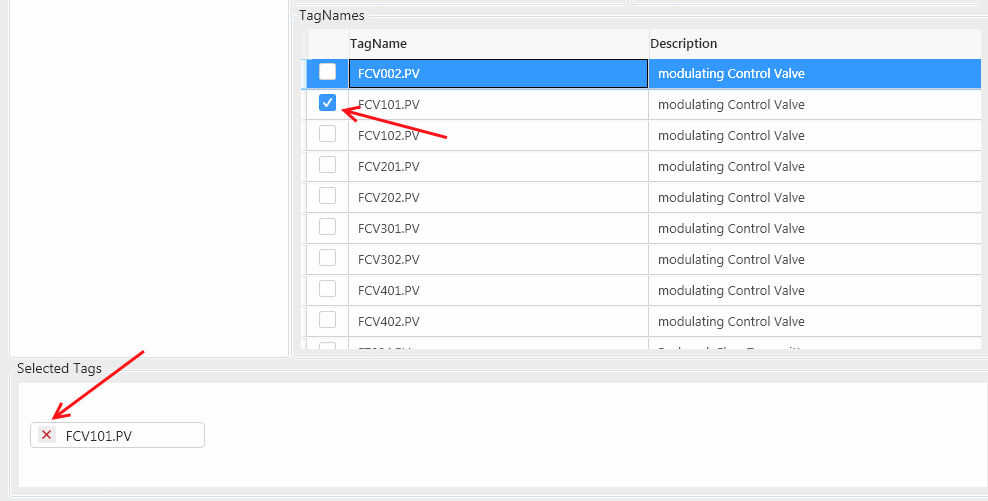
Select Tags
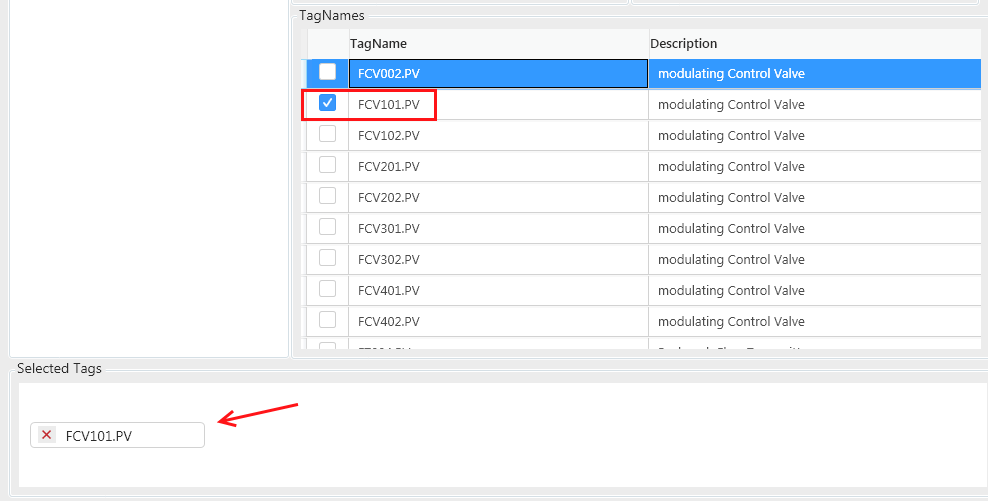
To select a Tag, you can click on its checkbox to select it. Once a tag is selected, it appears in the Selected Tags panel like below
You can unselect a Tag by clicking again on its Selected check box or you can click on the cross button in the Selected Tags panel like below.
Important
To make a correct
Wonderware HistorianQuery you have to select one tag at least
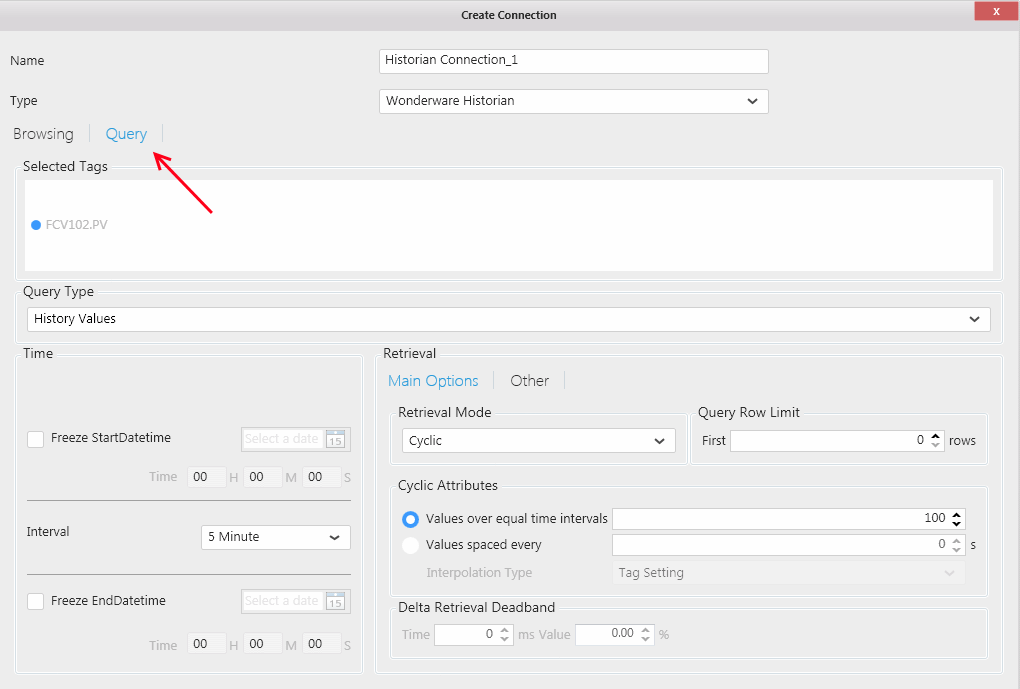
Query options
To set all the main Historian query options, click on the Query Tab show below
Important
For better performance, it is advised to avoid very large
belowHistorianqueries. please see the row limimation
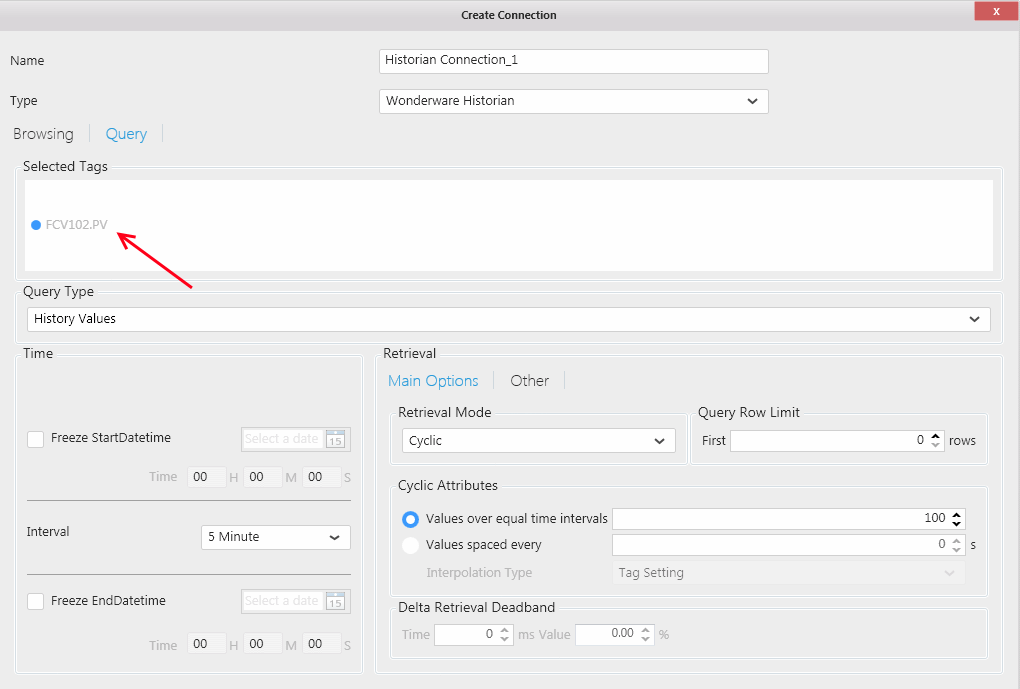
Before setting your query options , you can check if your desired tags appear in the Selected Tag panel like here.
Query Type
You can select the Historian Query type in the following Combobox:
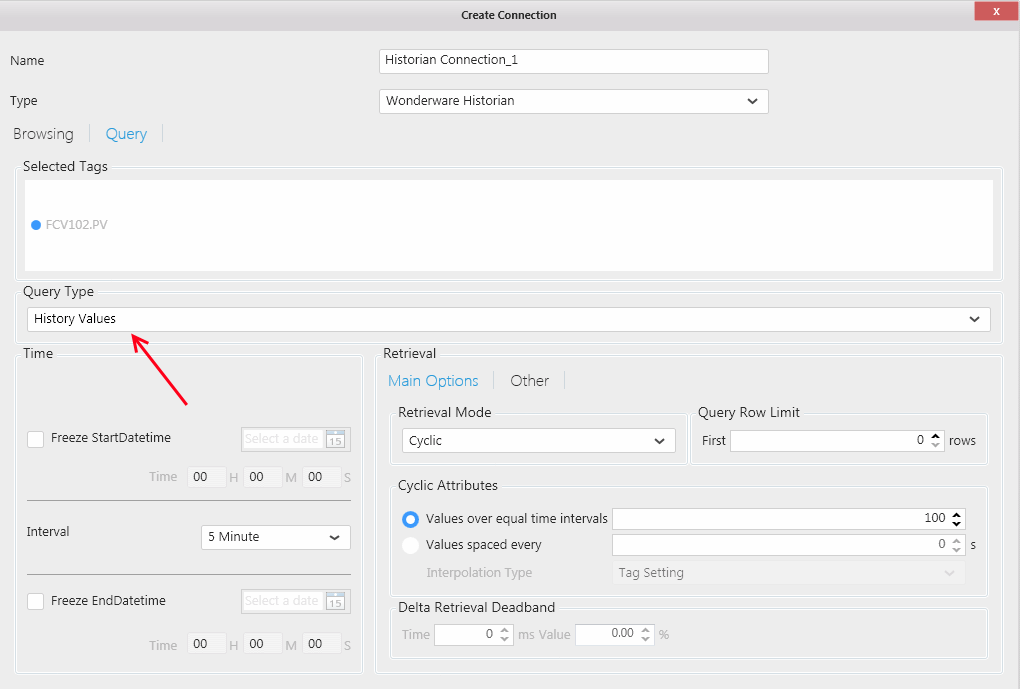
The following mode are supported:
- History Values (Selected by Default)
- State Statistics
Time Settings
In the panel below you can configure the time setting for the query.
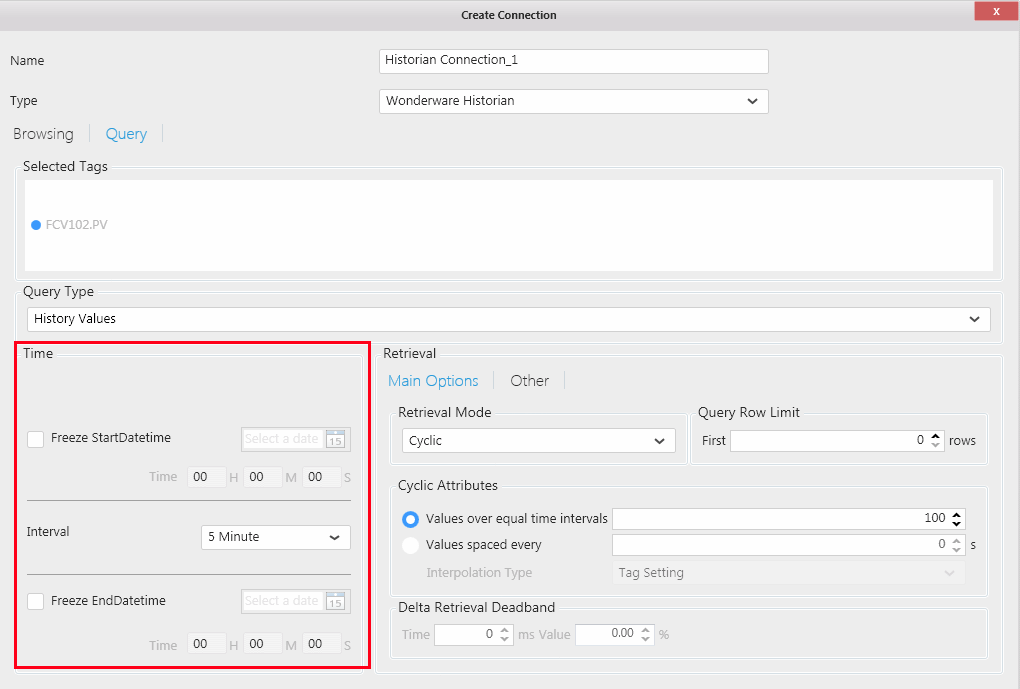
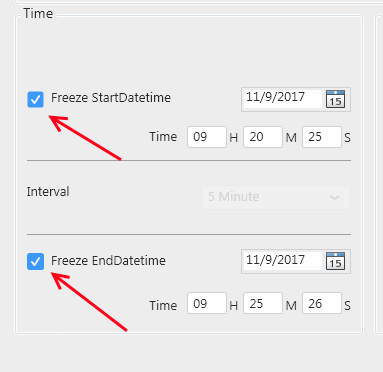
You have the possibility to freeze the StartDatetime or the EndDatetime here by checking it like below the desired checkbox, otherwise the EndDateTime value is the current datetime and the StartDatetime is depending from the EndDateTime and the selected interval.
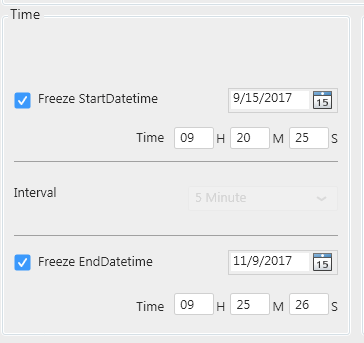
then you can configure the Datetime by clicking on the Datetime Picker like here for example
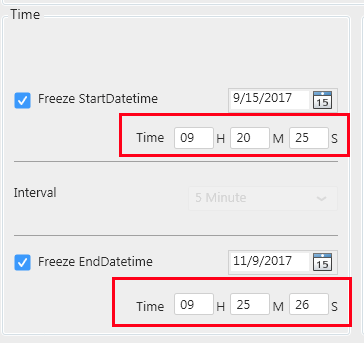
you can set the time by typing it in the following input
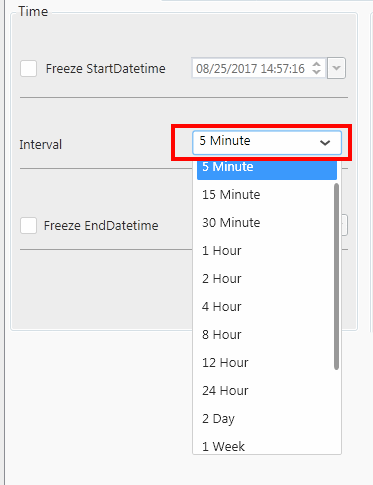
You can set the time interval here
Note
By default, the Freeze StartDateTime and the Freeze EndDateTime parameters are not selected
Note
If you select both, the interval option will be disabled
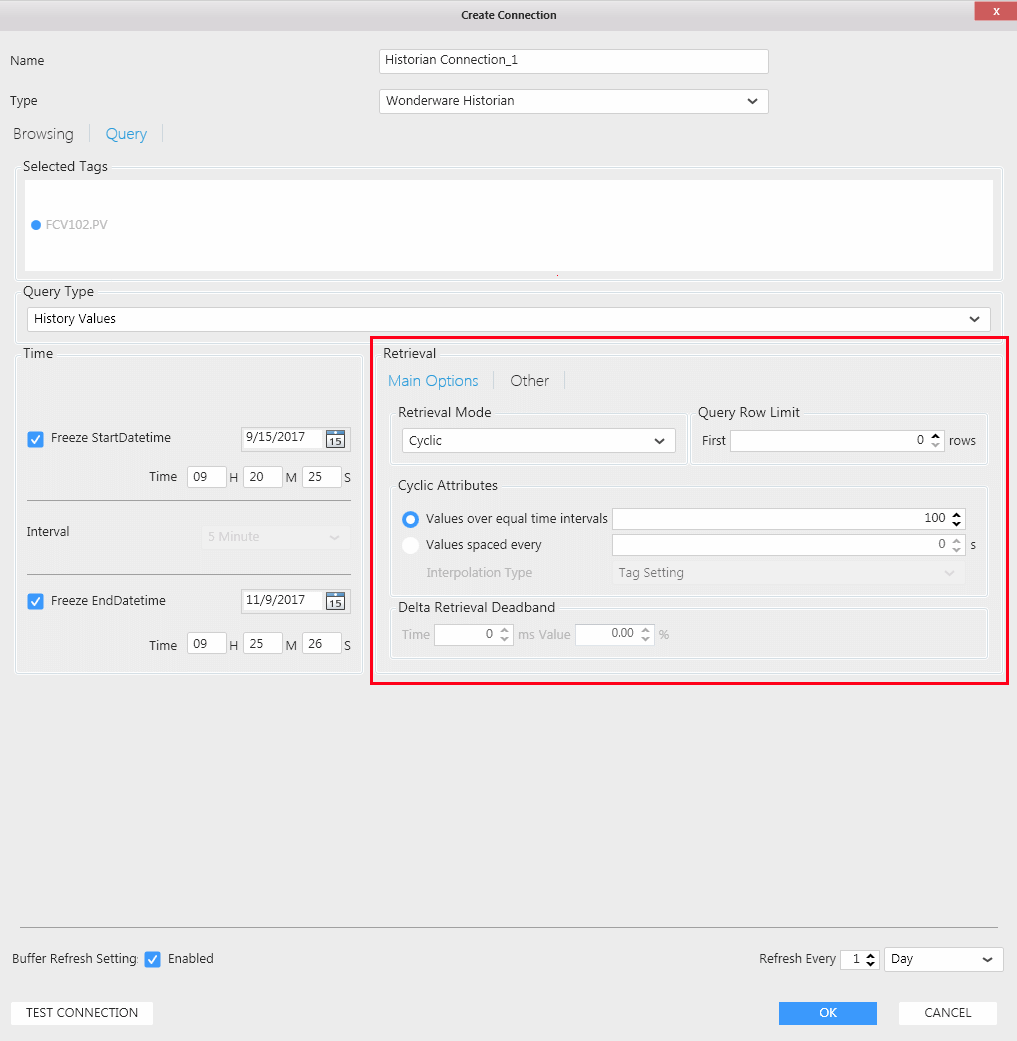
Retrieval mode
In the Retrieval area you can set the retrieval mode, the query row limit settings, the cyclic attributes and Delta Retrieval Deadband
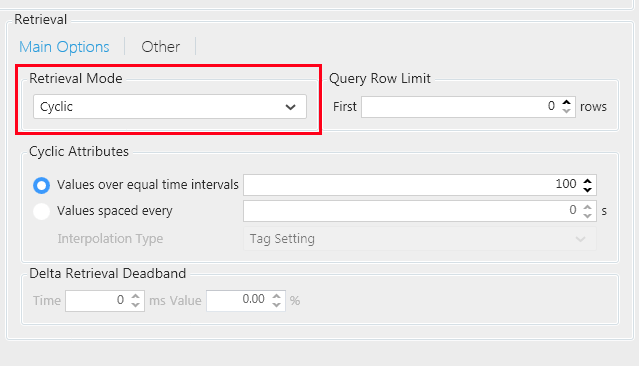
You can change the retrieval mode by selecting it in the following combobox (Cyclic by default)
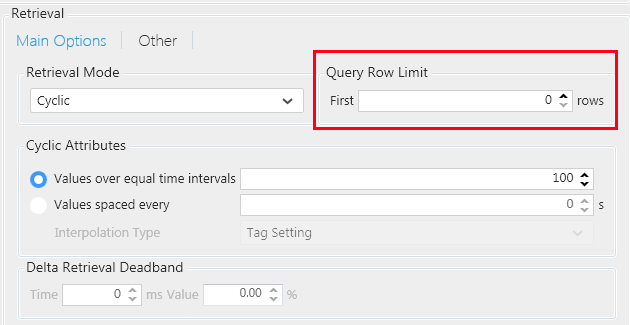
You can change the Query row limit by changing it below
you can change the Cyclic parameters in the panel shown below
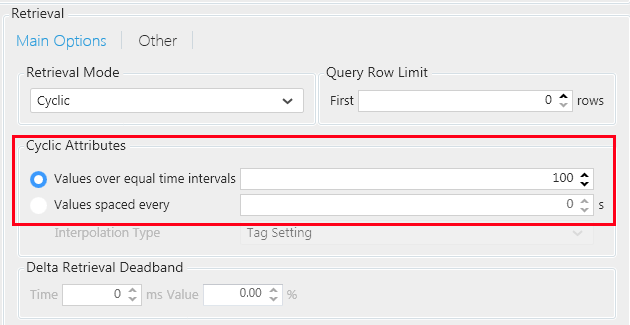
Note
The Cyclic panel control is accessible only when one of the following retrieval is selected: Cyclic, BestFit, Average, Min, Max, Integral, slope, Counter, ValueState, Roundtrip
you can change the Delta parameters in the panel below
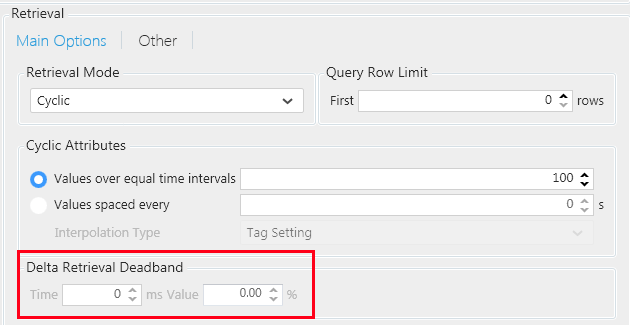
Note
The Delta panel control is accessible only when Delta retrieval is selected.
To display the other retrieval options click on the Other button like below
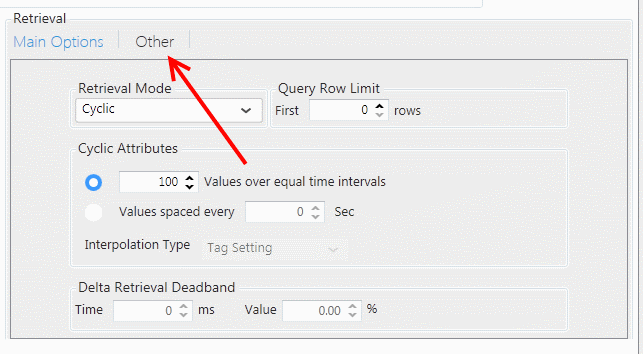
The other option display screen appears like below
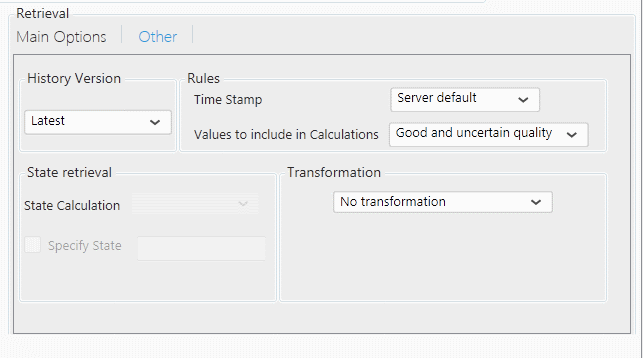
Here, you can configure the History Version, the Rules Settings the State Retrieval (available depending the retrieval mode chosen) and the Transformation options
Note
The Phantom Cycle : Do not include boundary values feature is currently not supported
Now, after setting all the desired parameters you can click the OK button , and you should see the screen below.
Now, take a look at this section here to know how to add a Data Source.
Rows Limitation
Important
In order to limit performance issues for huge Historian queries, a limit of
10000results is set.
When a Historian query returns more than 10000 results, it returns the first 1000 for performance reason in the data preview. To indicate that data is truncated, the field IsResultTruncated is set to 1 like below
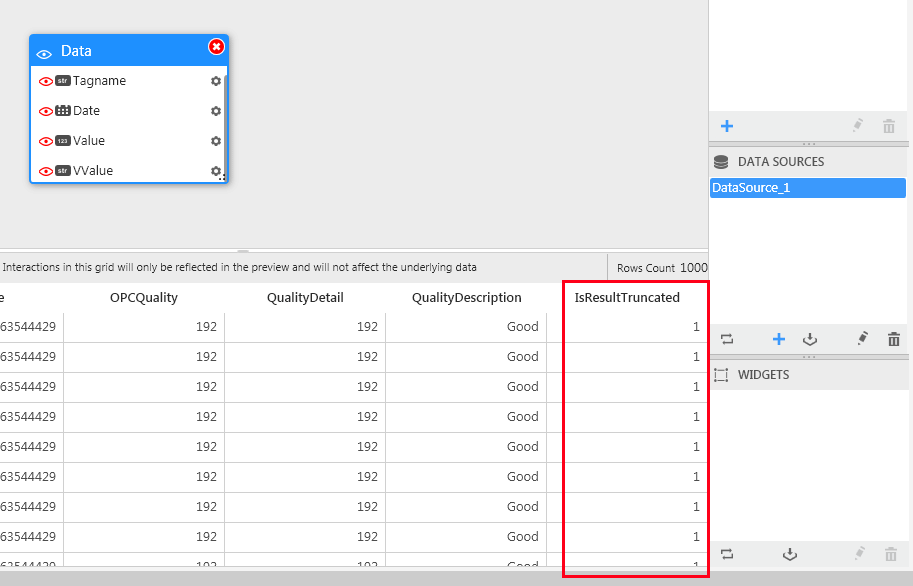
The IsResultTruncated field value is equal to 1.(value equals to 0 when not truncated)