Configuring the Code 192 Data Integration Tool
Code192 Data Integration Tool is a self-hosting service which is prepared to be installed only in data servers. It is responsible for extracting data from Wonderware Historian Server or RESTful web services and incremental update data for web accessible resources on the time based schedulers.
Service status
The service status can be checked by doing a right click on the Code192 Data Integration Tool Icon in Windows task bar which look like below
![]()
Right click on it, select Data Integration Tool Service and click Start if the service is not running like below
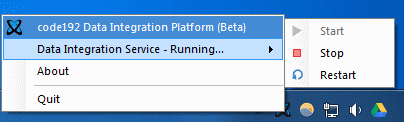
You can also click Stop to stop the service if needed.
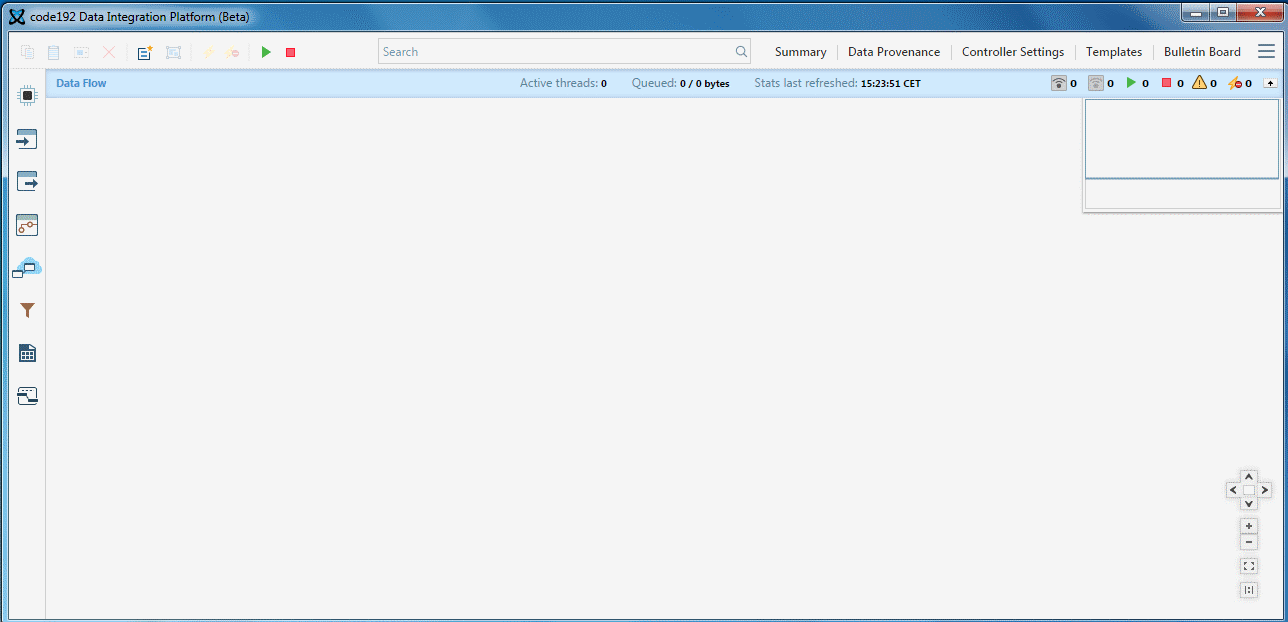
You can also left click once on the icon to launch the visual interface like below
Now, to be able to configure the schedule of a live dashboard.
Launch the Scheduler
After setting on the Code192 Data Integration Tool service we can publish the reports that were created using Wonderware Historian Server or Web Data Source in the data server by the following way.
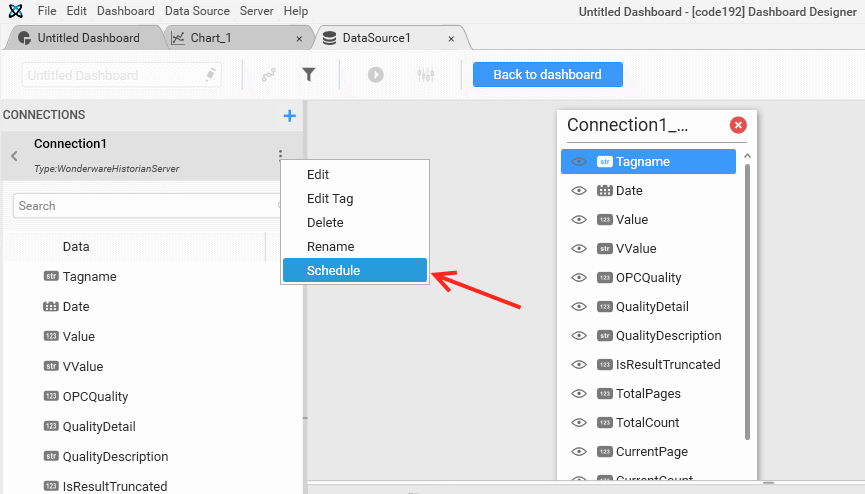
Once you have completed the Dashboard click on your data source to configure the Scheduler.
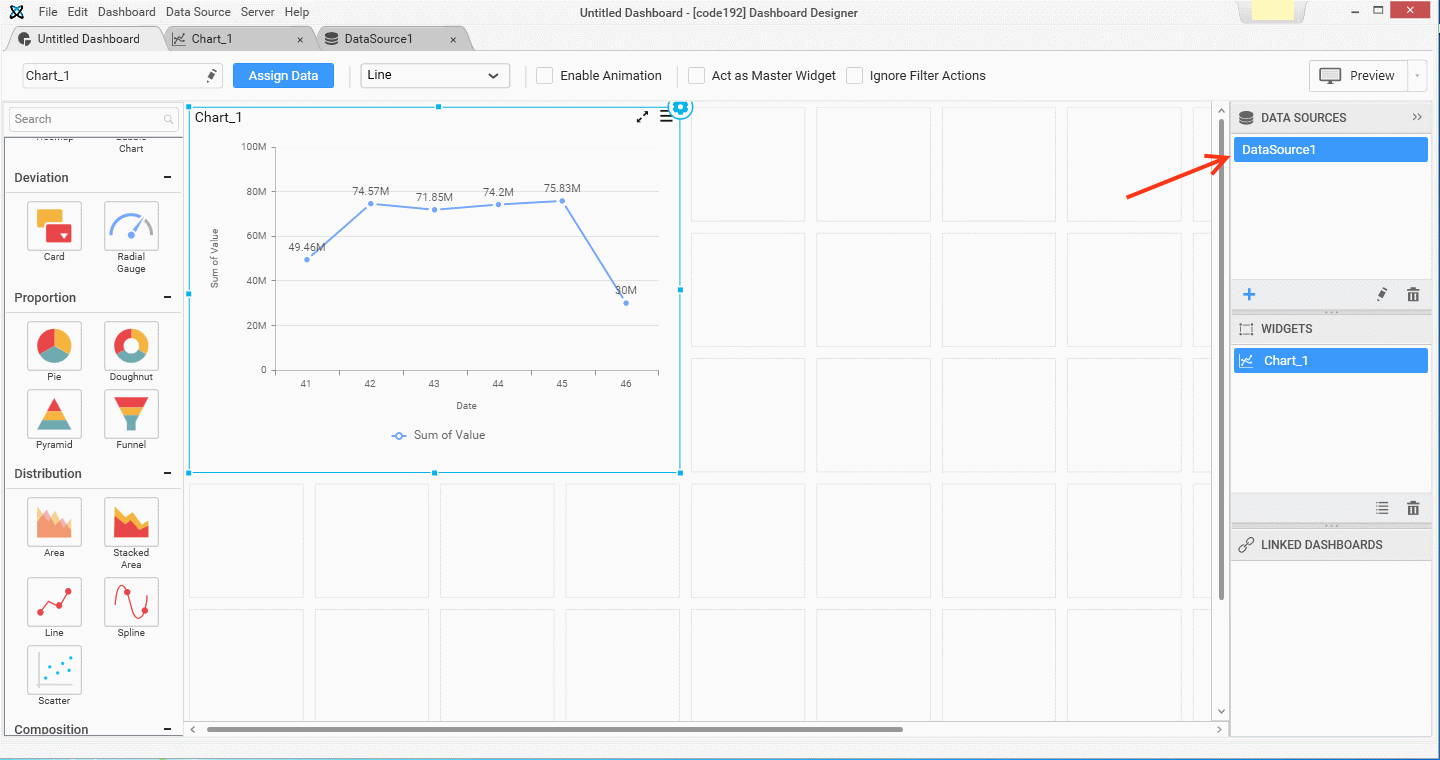
Select your Wonderware Historian server connection or your Web Data source connection and click on its option button like below
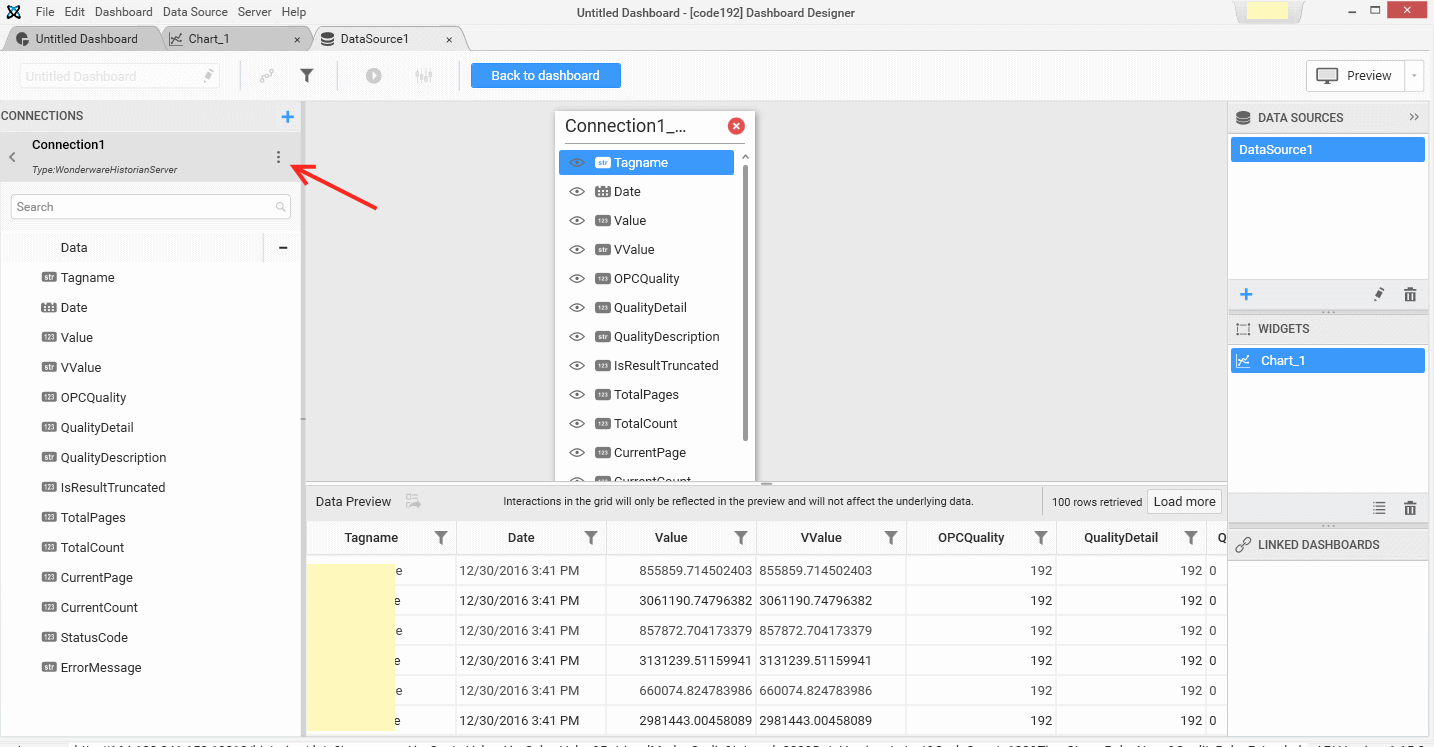
Click on Schedule
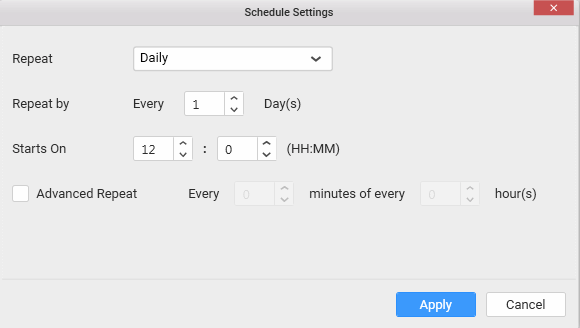
Then, the schedule window opens, it looks like below
CRON Expressions
The Data Integration Tool Schedule requires a CRON expression. The Dashboard Designer Scheduler helps you to generate this expression.
Cron Expressions are strings that are actually made up of seven sub-expressions, that describe individual details of the schedule. These sub-expressions are separated with white-space, and represent:
- Seconds
- Minutes
- Hours
- Day-of-Month
- Month
- Day-of-Week
- Year (optional field)
Note
Seconds field is currently not available in the Dashboard Designer scheduler
The Day-of-Month field can be specified as values between 0 and 11 for Jannuary to December or strings like JAN, FEB, MAR, APR, MAY, JUN, JUL, AUG, SEP, OCT, NOV and DEC.
The Day-of-Week field can be specified as values between 1 and 7 (1 for Sunday) or by using the strings SUN, MON, TUE, WED, THU, FRI and SAT.
Note
the
?character is acceptable for the Day-Of-Month and Day-of-Week fields. Please see below
Example
A CRON expression like: 0 0/0 0/1 1/1 * ? *
We could translate by “Update the dashboard every hours of every Day”.
It would be in our common language “Update every hour”.
The / character
The / character can be used to specify increments to values. For example, 0/15 in the minute’s field means starts every 15 minutes from an hour starting at minute 0.
So, that will start at 15,30,45 minutes of each hour.
Now, if you want to start each hour from 30 minutes start (nothing between 0 and 29 minutes of each hour) and each 10 minutes interval from that, you can set 30/10 in the minutes field.
So, It will start each hour at 30,40,50 minutes of each hour.
So, if it’s 1pm and your CRON expression is : 0 30/10 0/1 1/1 * ? *
Update will start only at:
- 1:30pm
- 1:40pm
- 1:50pm
- 2:30pm
- 2:40pm
- 2:50pm
- 3:30pm
and so on..
Note
- The 0/1 in the hours field means each hour from midnight
- The 1/1 in the Day-of-Month field means every day from the first
The * character
The * character means each possible value of this field. For Example: Every minute, Every hour or Every Day.
Note
1/1in day field is equivalent to*in the same field which isevery dayin both case.
The ? character
The ? character is allowed for the day-of-month and day-of-week fields. It is used to specify no specific value. Useful when you don’t want to specify a particular day.
Configure the Dashboard Designer Scheduler
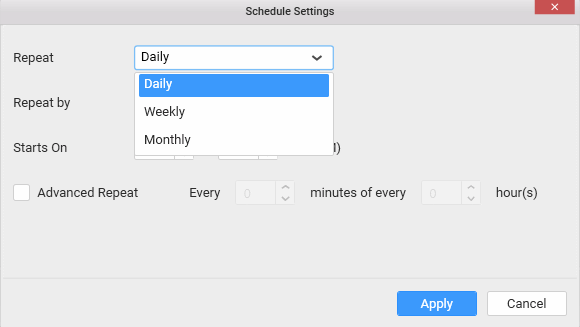
The Dashboard Designer Scheduler lets you choose between three repeat mode.
You can choose between Daily, Weekly and Monthly like below.
Set the repeat setting. Now depending on your choice, please check below the description.
Daily repeat
Set the Repeat By setting like the field below.
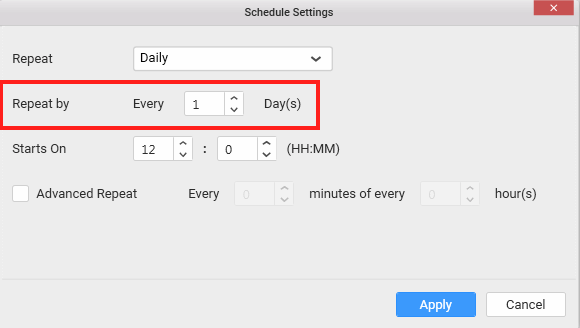
That will set the Day-of-Month CRON value.
Set the Starts On setting like in the field below.
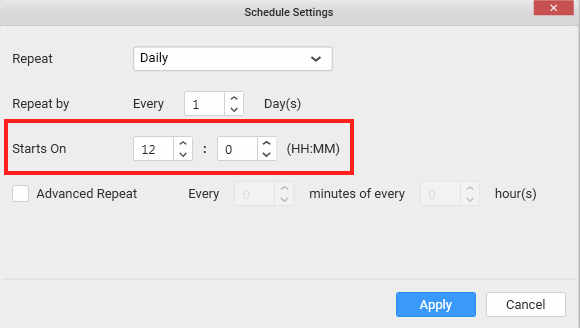
That will set the starting minute and hour CRON values.
Important
Without the Advanced repeat option checked, It will only run once per day.
For example: with 12 in the hour field like above. it will run every day, once at 12 O'clock
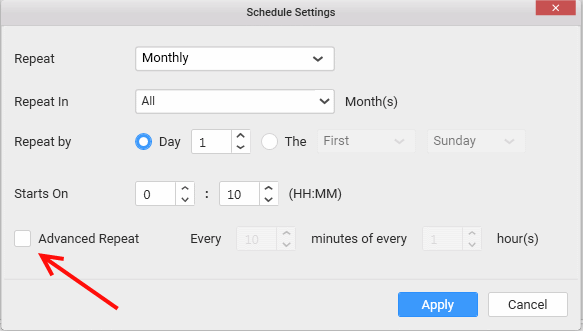
For repetition, check the Advanced Repeat option like below.
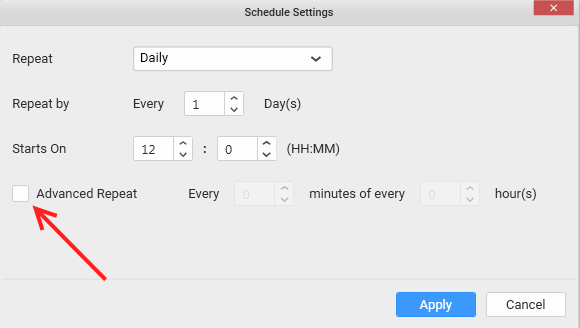
Now, the advanced field is available like below.
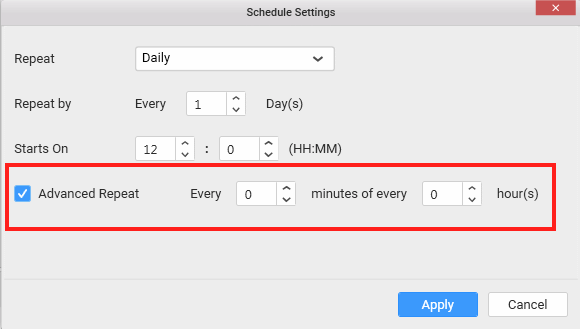
When Setting here repetition for Hours and Minutes values, it will set the Hours and Minutes CRON values.
Please see the Advanced Repeat section below for more details here.
Then, click Apply.
Weekly repeat
Set the Repeat option on Weekly like below
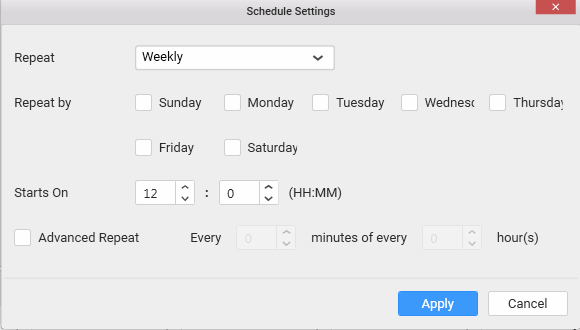
Select the Repeat By option by selecting the day of the week in the field below
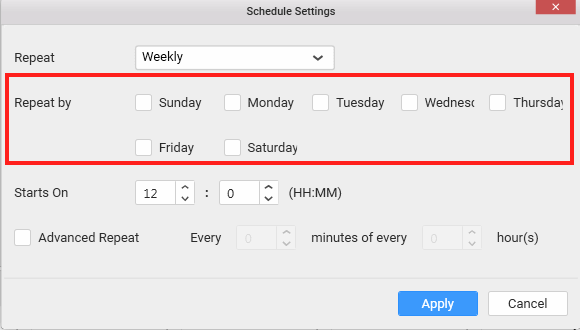
That will set the Day-of-Month CRON value.
Set the Starts On setting like in the field below.
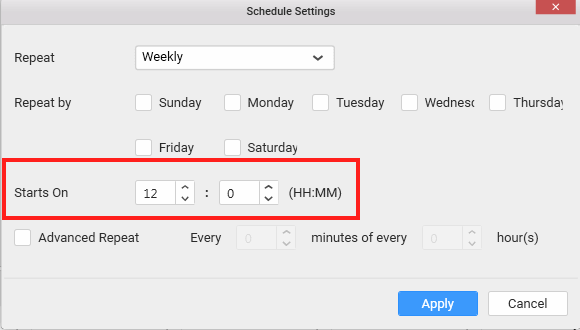
That will set the starting minute and hour CRON values.
Important
Without the Advanced repeat option checked, It will only run once per selected day.
For example: with 12 in the hour field like above. it will run every selected day, once at 12 O'clock
For repetition, check the Advanced Repeat option like below.
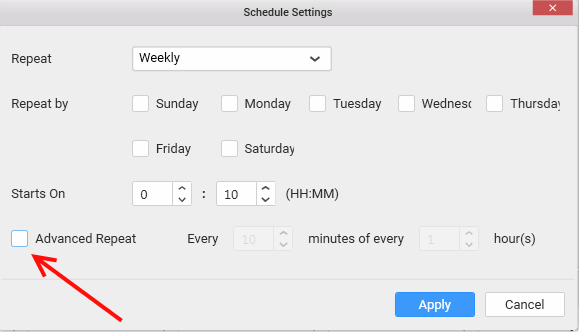
Now, the advanced field is available like below.
When Setting here repetition for Hours and Minutes values, it will set the Hours and Minutes CRON values.
Please see the Advanced Repeat section below for more details here.
Then, click Apply.
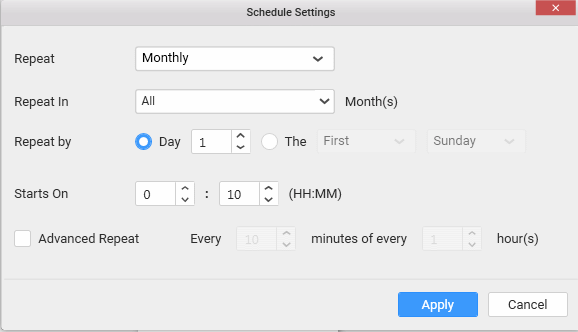
Monthly repeat
Select Monthly Repeat option like below
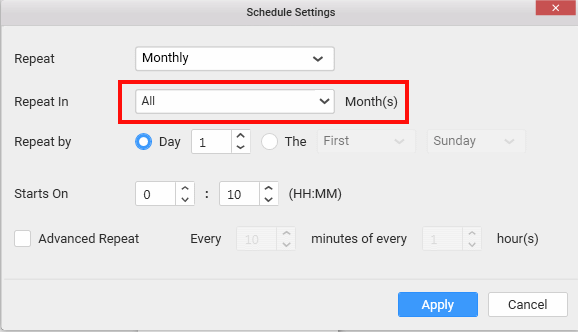
Click on Repeat In List field below to select the months.
Then the following panel appears
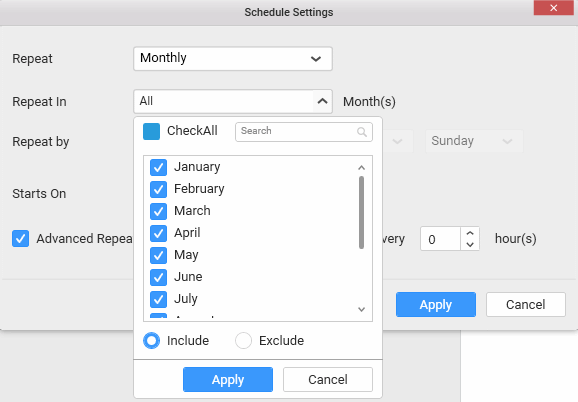
By default, Check All is select. Click on it to unselect all.
Then, choose if you want to include or exclude the selected month in the field below by clicking on it.
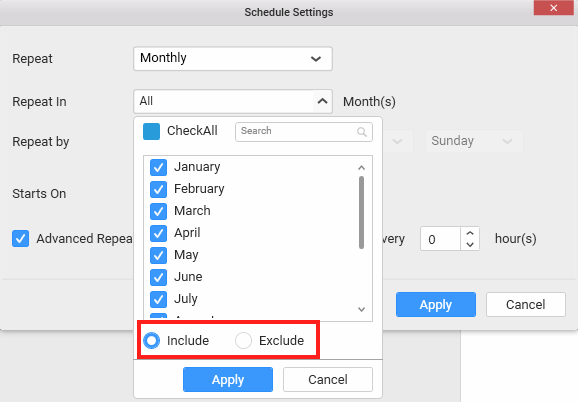
Select which month to include or exclude by clicking on it, then click Apply.
The Repeat by option by repeating by Day by Default, you can set the number of days to repeat in the red field below.
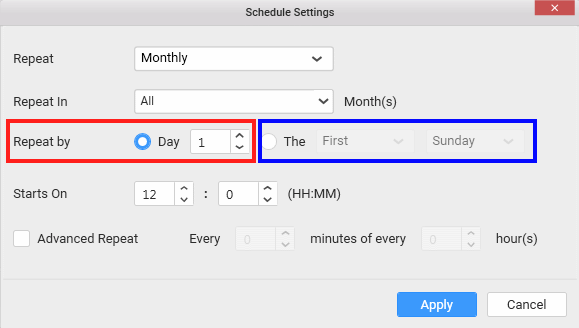
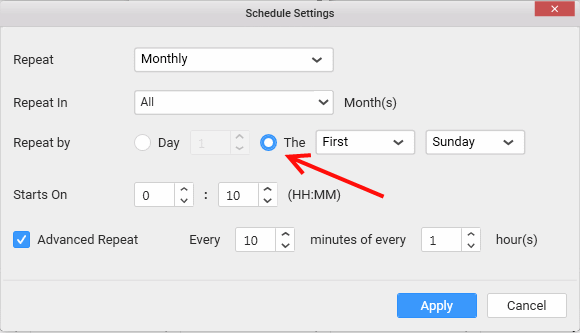
Or, if you need to Repeat By a certain pattern like the first Sunday of the selected month, you can select the blue option shown above by clicking on its radio button like below
Then, click on the first list if needed to change it like below
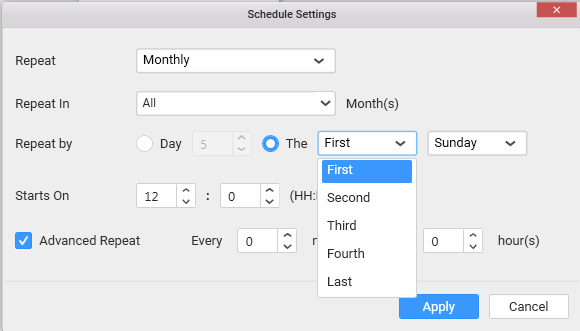
Click on Sunday to change the day if needed, then change the value of the Starts On field shown below if needed
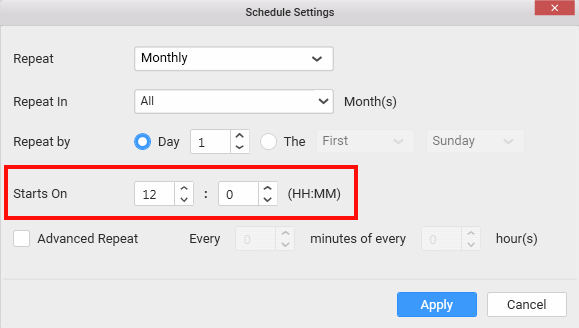
That will set the starting minute and hour CRON values.
Important
Without the Advanced repeat option checked, It will only run once per selected Month.
For example: with 12 in the hour field like above. It will run every selected Month repeated by your selected Repeat By option above, once at 12 O'clock
For repetition, check the Advanced Repeat option like below.
Now, the advanced field is available like below.
When Setting here repetition for Hours and Minutes values, it will set the Hours and Minutes CRON values.
Please see the Advanced Repeat section below for more details.
Then, click Apply.
Advanced Repeat
For each Repeat mode, the Advanced repeat option has the same effect.
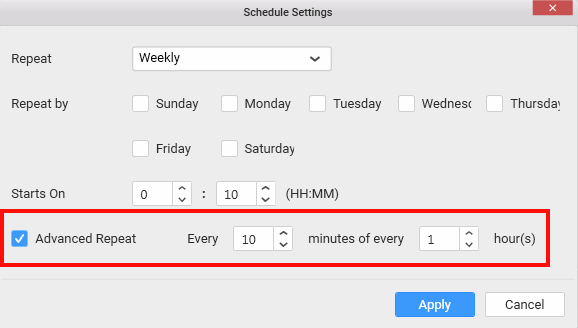
For example
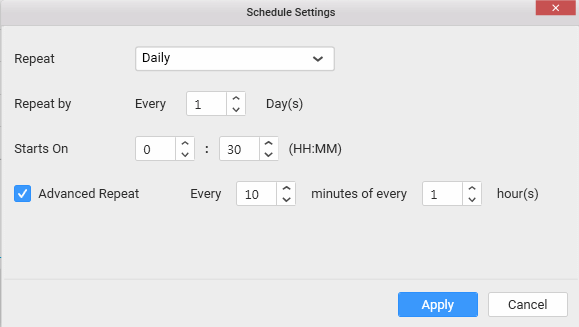
With settings like the screen above, the CRON expression generated will be : 0 30/10 0/1 1/1 * ? *
Important
When setting on
Advanced Repeatoption, theStarts Onvalue will increment values.the
Starts Onvalue is the left part value of your/from your minute or hour CRON field.The
Advanced repeatvalue is the right part value of your/from the same minute or hour CRON field.This is the reason why when you set values like on the screen above the
30/10Minutes CRON field is generated.
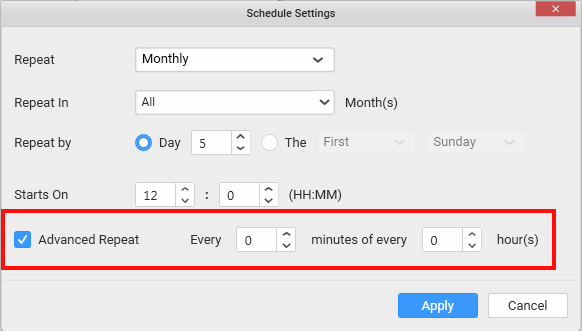
Another Example
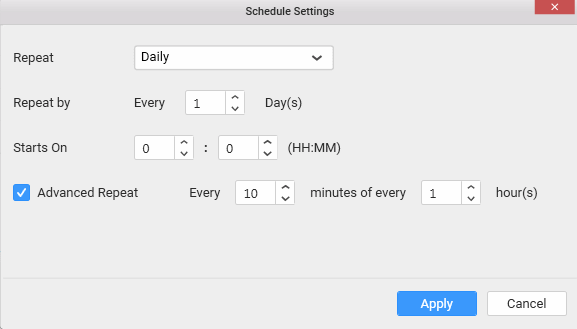
With settings like the screen above, the following CRON expression will be generated: 0 0/10 0/1 1/1 * ? *
So, the dashboard will be updateded each 10 minutes every hours.
Last Example
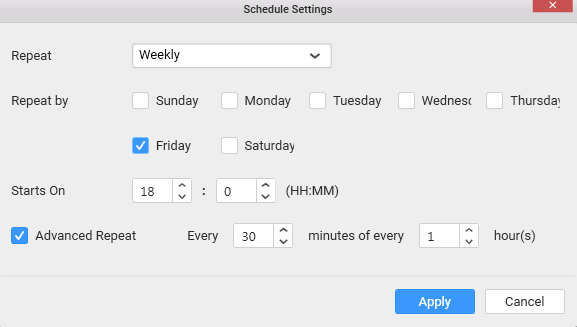
With settings like the screen above, the following CRON expression will be generated: 0 0/30 18/1 ? * 6 *
So, the dashboard will start each friday from 18:00 each hour, at 30 minutes
So it will run each Friday exactly at:
- 18:30
- 19:30
- 20:30
- 21:30
- 22:30
- 23:30
All informations about CRON expression are explained above here
Check the CRON expression in Data Integration Tool
After published your live dashboard, you maybe want to check if the CRON expression generated was what you expected.
For this, open Data Integration Tool by clicking on its icon on the Windows task bar.
Then, the window opens like below
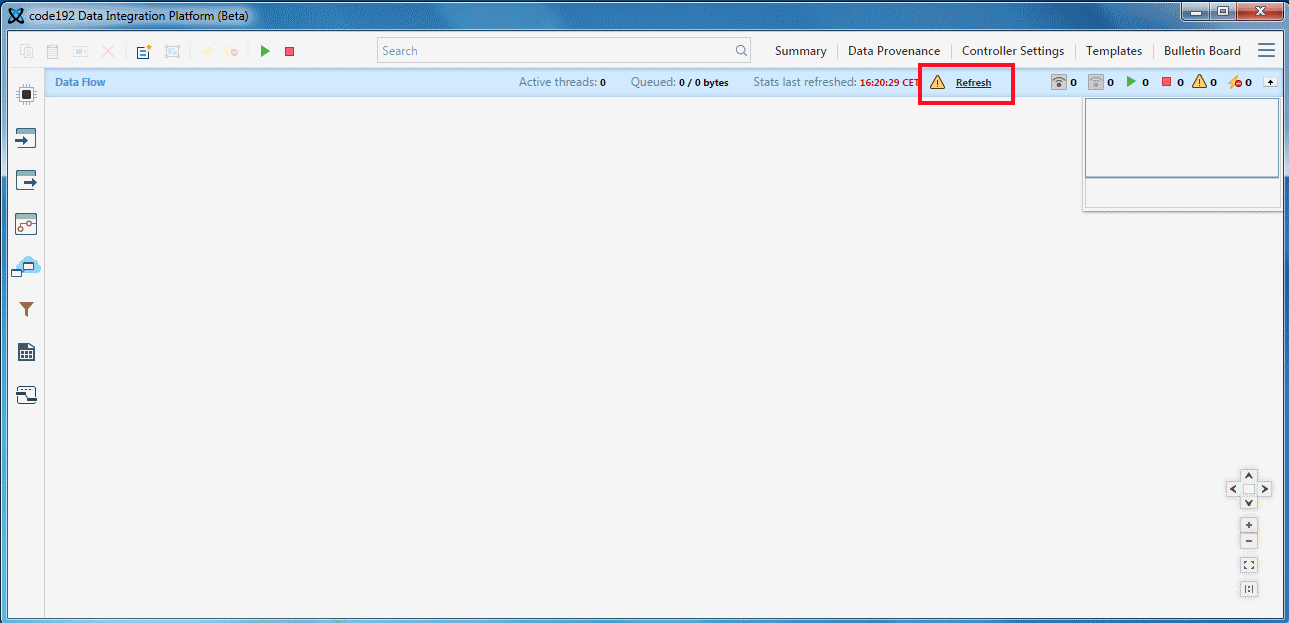
There is nothing on the screen except the warning sign shown in the screen above. Click refresh.
Then, the [Code192] Process Group appears like below
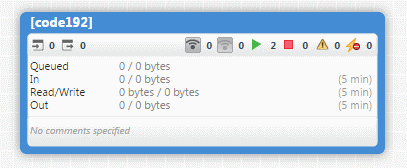
Double click on it or right click on it and click enter group button, the next group appears like below
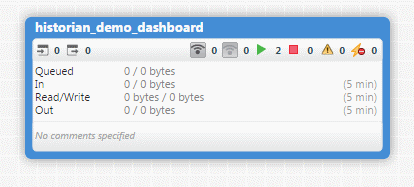
The name of this process group is the name of your dashboard.
Double click on it or right click on it and click enter group button, the next group appears like below
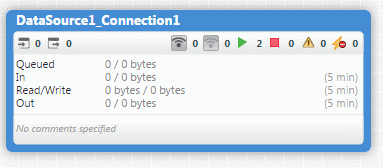
This time, the name of this process group is the combination of you data source name and your connection name.
Double click on it or right click on it and click enter group button, the next group appears like below
Now, your DataFlow appears like below
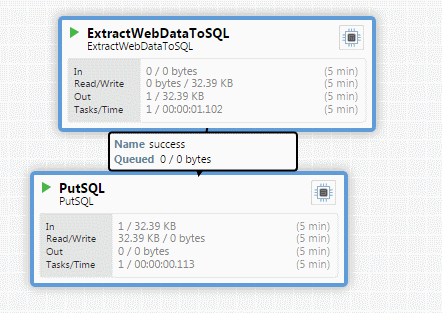
Then Right click on the RequestWebDataToSQL Process group like below
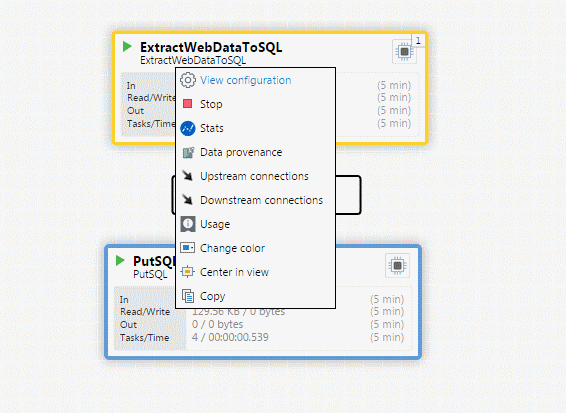
Then, click on View Configuration, and the processor details windows appears
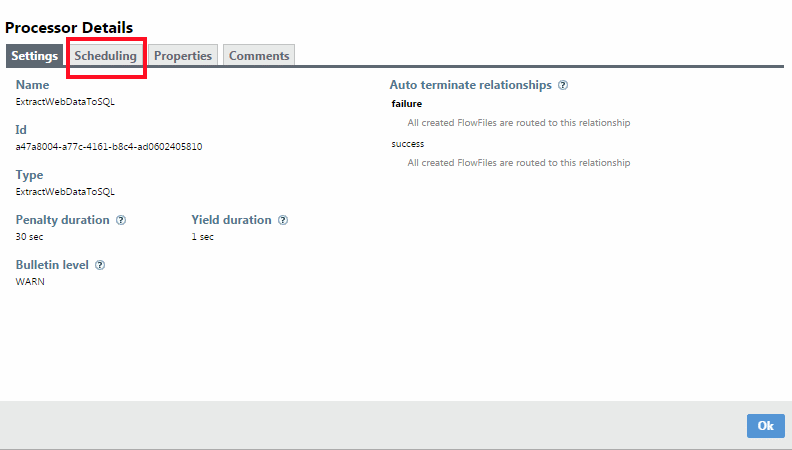
Click on the Scheduling tab shown in the screen above
Then, the scheduling information appears like below
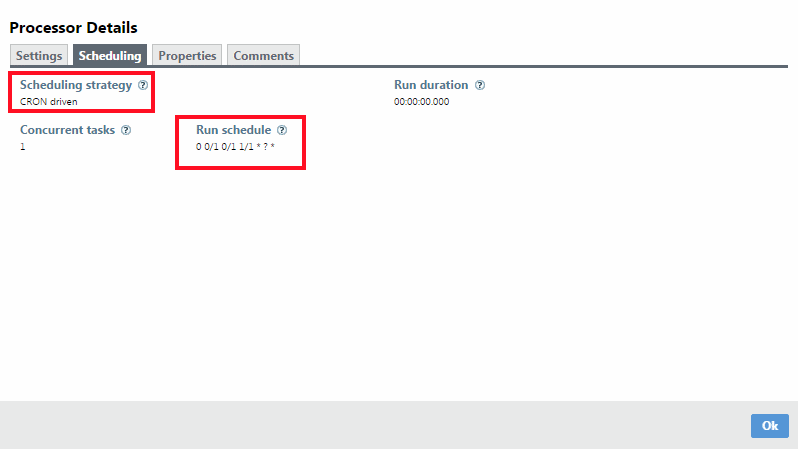
Now you can see the Scheduling strategy value is CRON Driven. And your CRON expression is under the Run Schedule information.