Publishing to Server
Dashboards and Data sources can be exported to server from Dashboard Designer through the Publish option in the Application Menu.
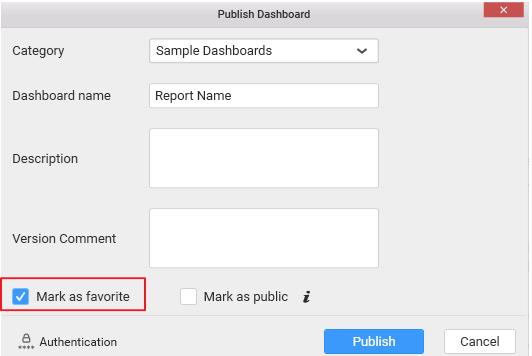
Publishing Dashboard to Server
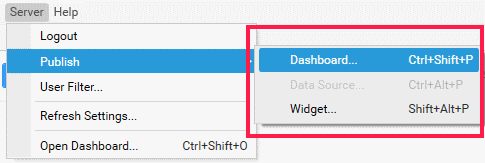
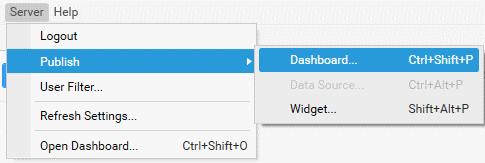
Click Server Menu and navigate to Publish menu item. Select Dashboard… menu item.
If you logged in to Dashboard Server already, you will be prompted with the publish dialog like below.
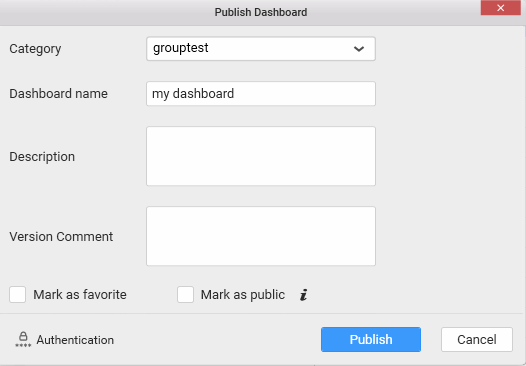
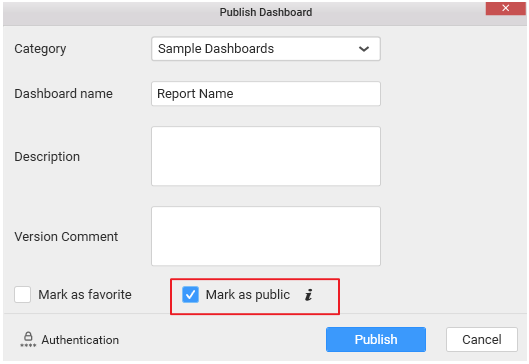
In this dialog, Category drop down list shows the list of categories added in the connected dashboard server. This represents the category under which the dashboard need to be published. Set the dashboard name near the Dashboard name label.
Important
Please do not include the
/charcter in the Dashboard Name. It is not supported.
Set the description, if you prefer, commenting over the dashboard, near Description area. Version Comment is for commenting over each version of publish. However, this is optional.
Information about Mark as public and Mark as favourite below in this page.
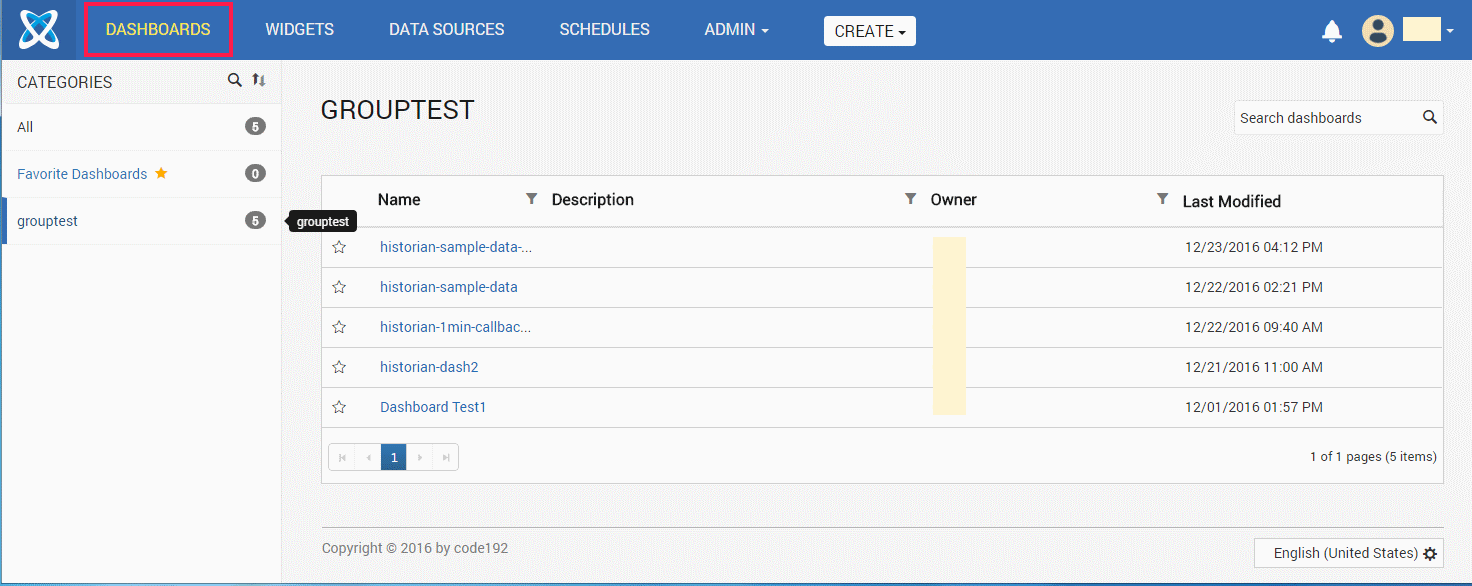
Click Publish to export dashboard to dashboard server. This dashboard can now be viewed under DASHBOARDS in the published dashboard server like below.
Click Cancel to cancel the export operation and close the dialog.
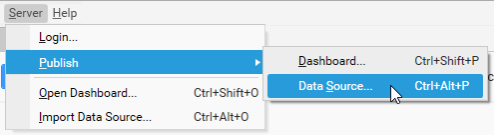
Publishing Data source to Server
Click Server Menu and navigate to Publish menu item. Select Data Source… menu item.
If you logged in to Dashboard Server already, you will be prompted with the publish dialog like below.
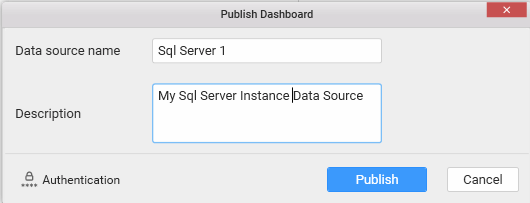
In this dialog, enter the data source name with which you require the data source to be published, in Data Source name text area.
Enter the description in the Description text area illustrating the data source, if required. This is optional.
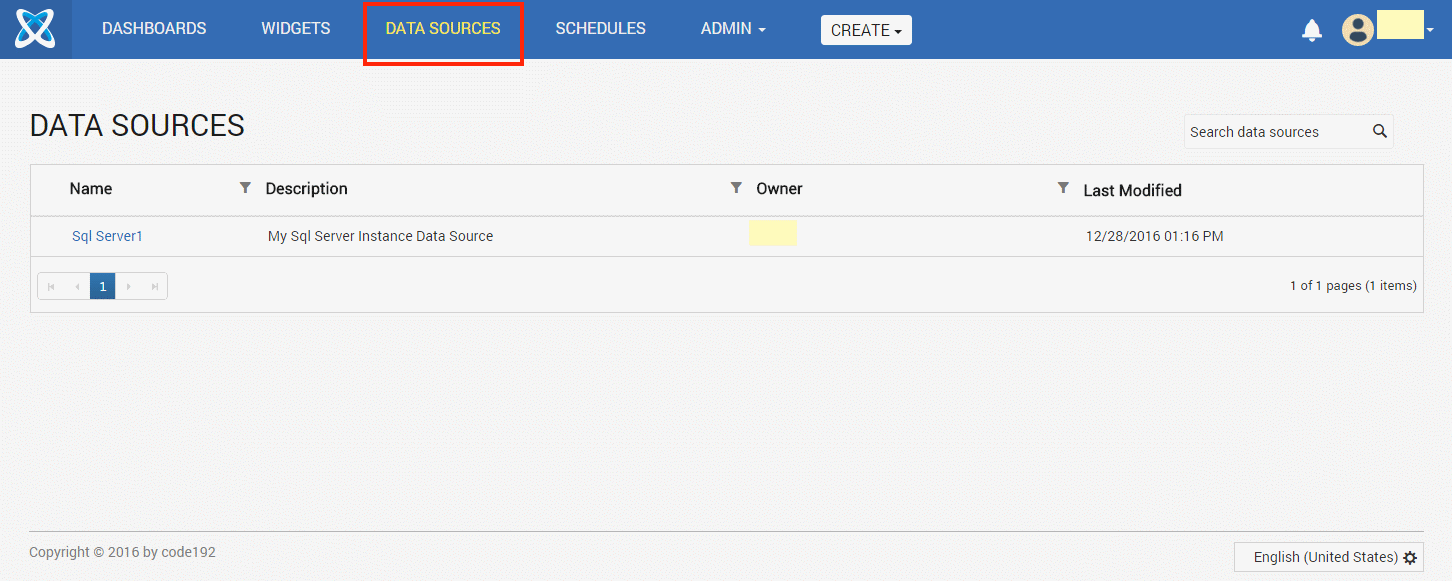
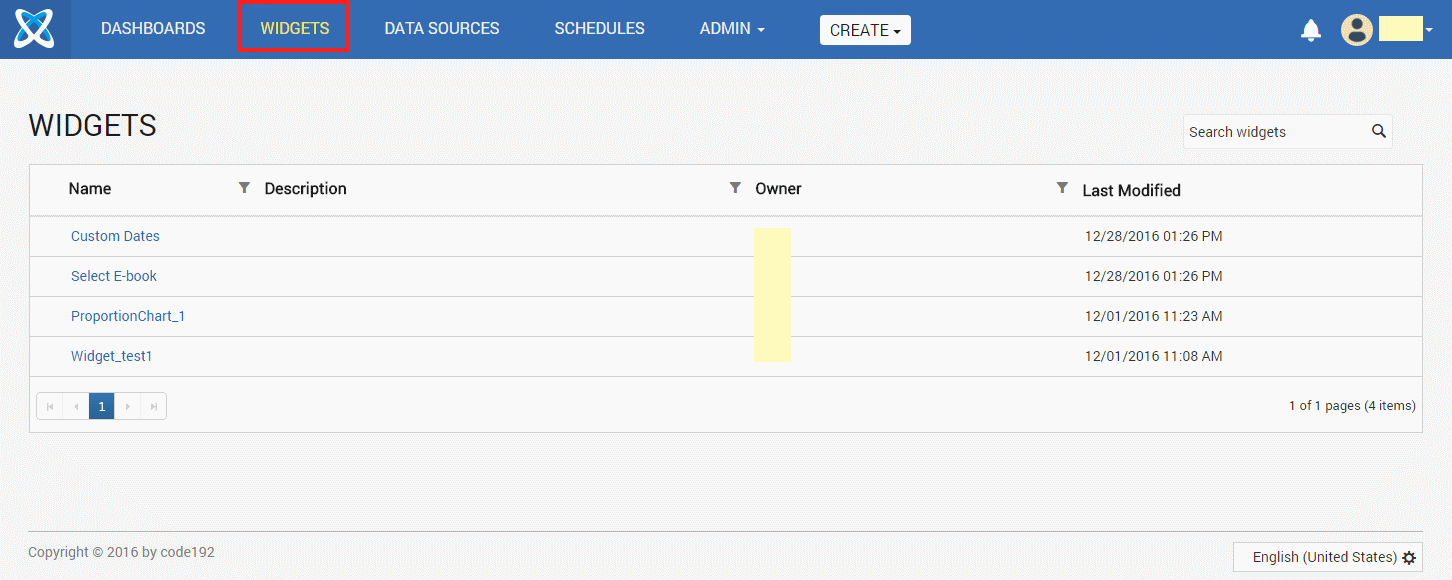
Click Publish to export data source to dashboard server. This data source can now be viewed under DATA SOURCES in the published dashboard server like below.
Click Cancel to cancel the export operation and close the dialog.
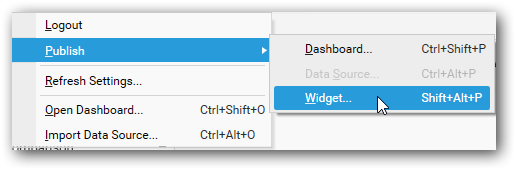
Publishing Widget to Server
Click Server menu and navigate to Publish menu item. Select Widget… menu item.
If you logged in to Dashboard Server already, you will be prompted with the publish dialog like below.
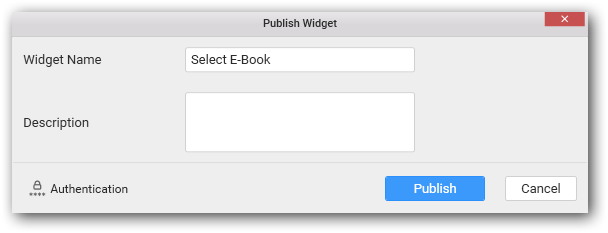
In this dialog, enter the widget name with which you require the widget to be published/exported to server, in Widget Name text area.
Enter the description in the Description text area illustrating the widget, if required. This is optional.
Click Publish to export widget to dashboard server. This widget can now be viewed under WIDGETS in the published dashboard server like below.
Click Cancel to cancel the export operation and close the dialog.
Publishing Data to Server
Data publish is required for publishing dashboards into dashboard server whose data was created through connection types other than server-based data connection types.
With this, proceeding after Publish Dashboard dialog, the following dialog will be shown to feed the details of data server whose system requirements has been discussed here. The data server should either have Microsoft SQL Server installed or ODBC-enabled databases like Oracle , MySQL or, or Spark SQLconfigured.
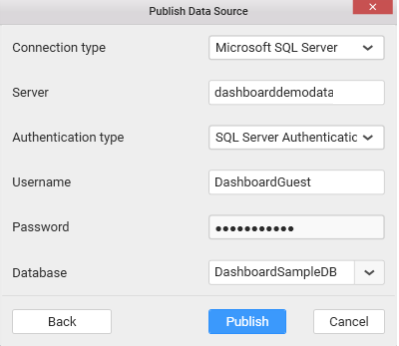
For data connections, other than the server typed connections such as CSV, Microsoft Excel, JSON, Salesforce, Web Data Source and Microsoft Azure Table Storage the data will be moved into the servers optionally as SQL Server<p>, Spark SQL</p> or ODBC-enabled databases (<p>MSSQL,</p> <p>MySQL or</p> Oracle) from the in-memory database which has been created while designing the data source.
Important
To Publish a Live Data Dashboard please see the Code192 Data Integration Tool overview here
User Filter Configuration
You may configure user filters to restrict data view based on user logged in. Please refer here for more detail.
Public Accessibility
You can mark a particular dashboard as publicly accessible while publishing it to a Dashboard Server, so that the published dashboard can be viewed by anyone through the URL without the server credentials to log in. To set dashboard as public, enable the check box Mark as public in the Publish Dashboard dialog.
Note
Setting dashboard as public will disable the user based filter and other user specific functionalities applied to the dashboard.
You can mark a dashboard as public even after publishing to dashboard server as discussed here.
Marking as Favorite
You can mark a particular dashboard as favorite while publishing to a Dashboard Server, so that dashboard can be listed under Favorite Dashboards category in the Dashboard Server. To set a dashboard as favorite, enable the check box Mark as favorite in the Publish Dashboard dialog.
You can mark a dashboard as favorite even after publishing to dashboard server as discussed here.