Getting Started with Alpana Dashboard Platform
In this training course, we will connect to a Microsoft SQL Server to get data, create a dashboard using Alpana Dashboard Designer and publish it to a server via Alpana Dashboard Server.
Finally, we will visualize the dashboard in a web browser.
This course is not intended to be an exhaustive instruction manual or a reference guide. It’s a walk-through to quickly publish a dashboard using code192 Alpana Dashboard Designer and code192 Alpana Dashboard server.
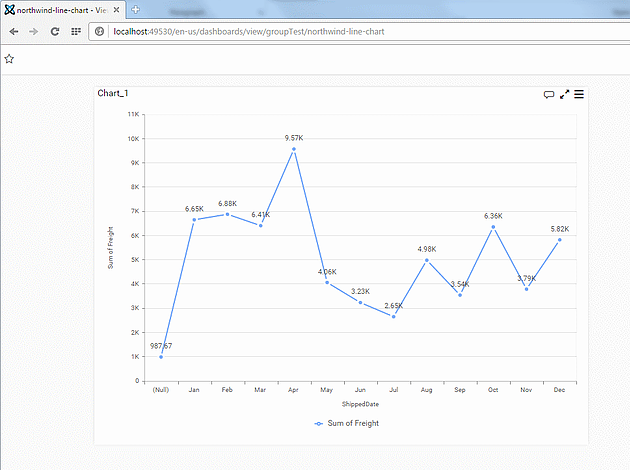
At the end of this course, we will be able to visualize a dashboard with one widget like this one below.
Show me how
1. Connect to Microsoft SQL Server
First of all, let’s connect to a Microsoft SQL Server via the Alpana Dashboard Designer.
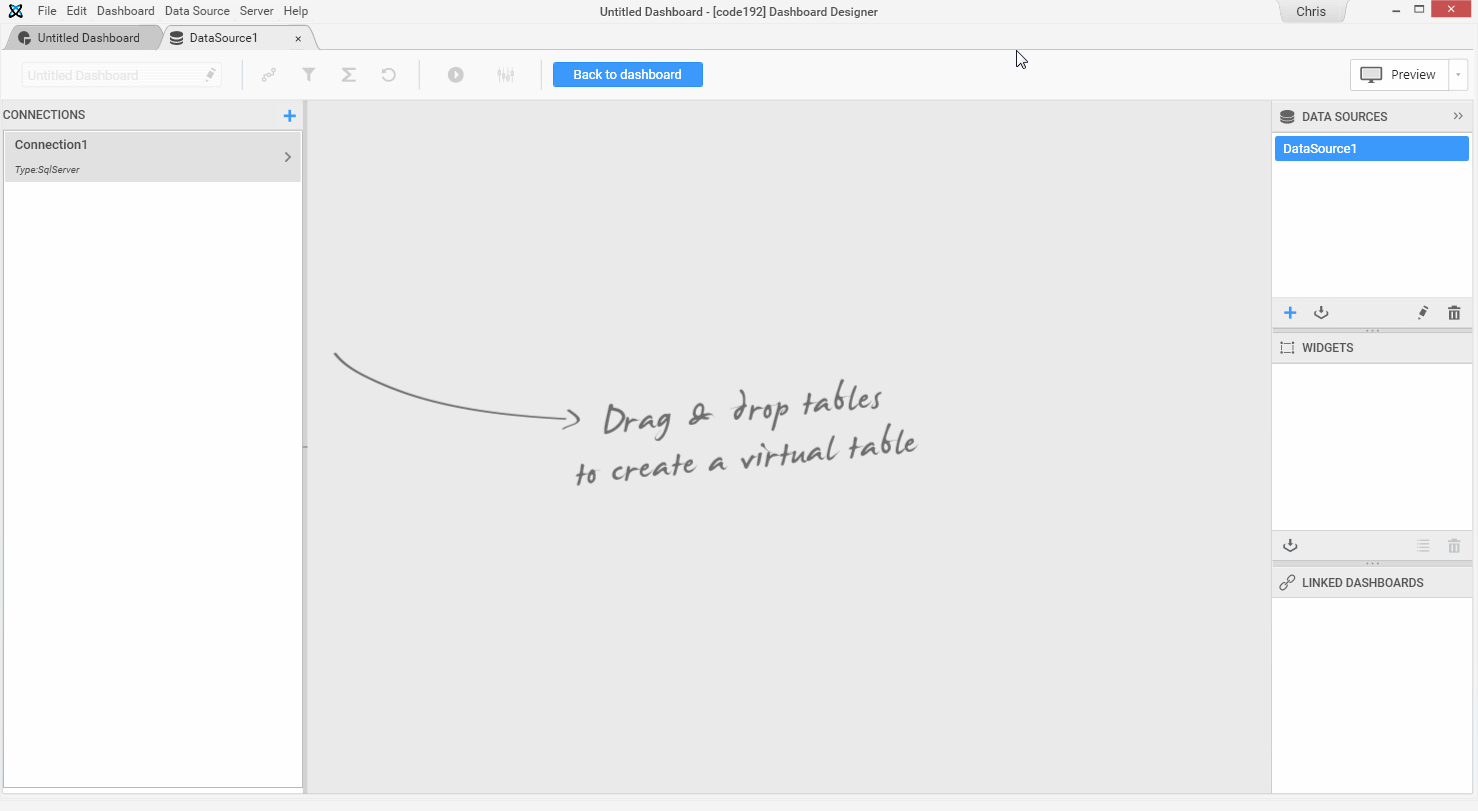
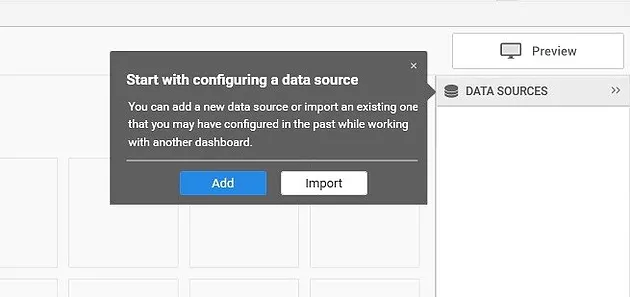
After opened the Alpana Dashboard Designer, the software invites you to add a data source, let’s do it by clicking Add.
Create the connection to the data source. In our example this will be a database, but it could be an Excel file, CSV file, Wonderware Historian server via our WEB API or a Web data connector.
Let’s use the Microsoft Nothwind Database as sample data. If you want to reproduce this example, don’t hesitate to get it here https://northwinddatabase.codeplex.com/ to restore the database to your SQL Server.
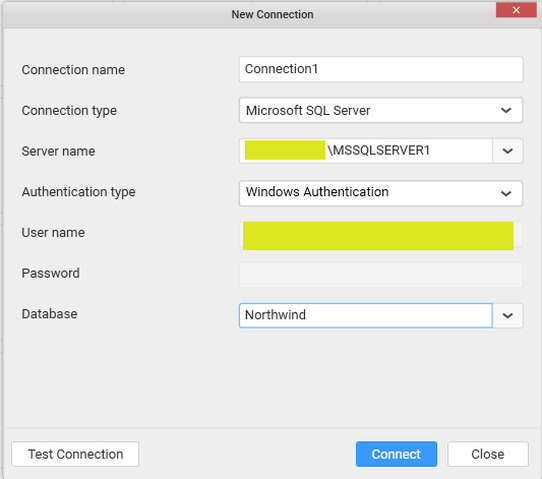
Set the needed information to connect to your server, select the Northwind database.
To ensure the settings are correct, you can click Test Connection, to try to connect to your server, if all the settings are correct, the following window should appear like below.
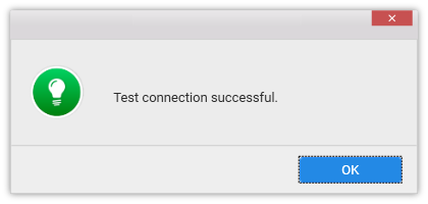
Click OK button to close the confirmation message and then click Connect button in New Connection dialog.
Then, click the Connect button in New Connection dialog. Now the following view displayed.