Creating a new Data source
To bind data to a widget, a minimum of one data source is required. A data source can be created through the following procedure:
Go to the Dashboard Design View and click the + button at the bottom of DATA SOURCES container as indicated in the below image.
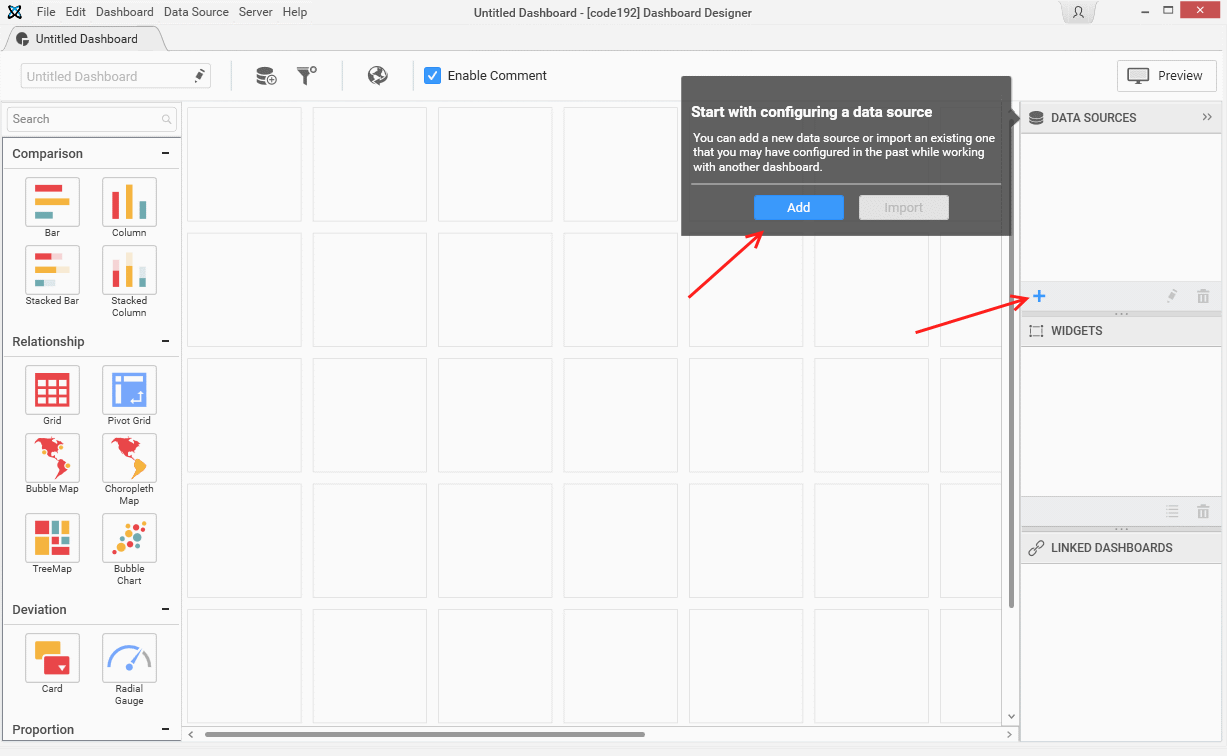
If it is the empty dashboard that was newly created, on launch, it will display a smart screen window through which too, the data source can be created as indicated in the above image.
The New Connection dialog will launch like below.
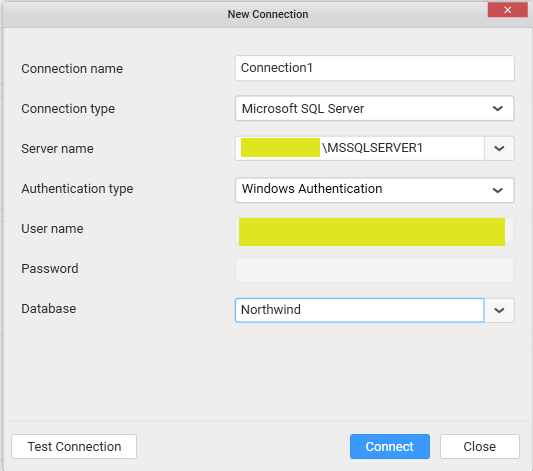
Enter a suitable name for data source at your convenience, fill the other details as requested and establish connection to the respective data source. Test Connection option will be available for server based data connection types to validate the connection with the details that you filled in.
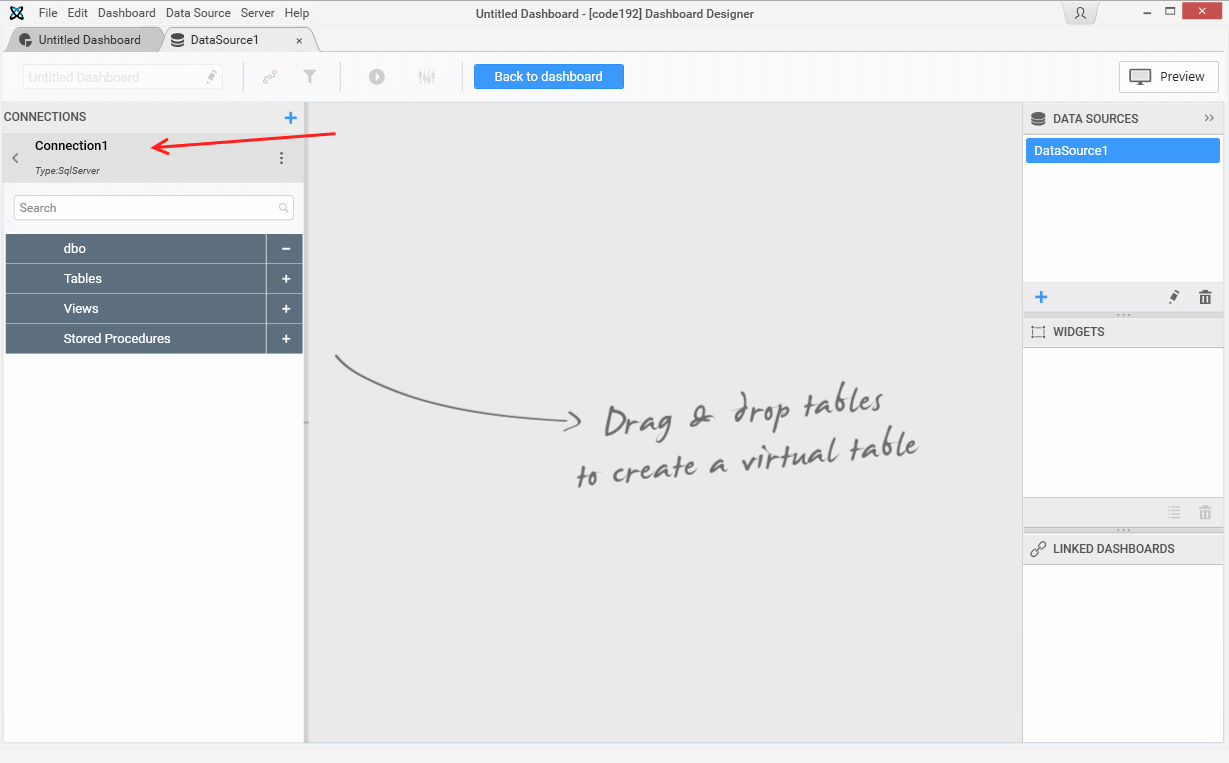
Click Connect to navigate to the data design view. It holds the tables, views, etc. available under the connection panel. Now, a new data source and a new connection were created.
Note
When you add the very first
Data source, a newConnectionis automatically added for you on the left pane like the screen below.
To add one or more connection please take a look to the Creating a new connection page for more details here
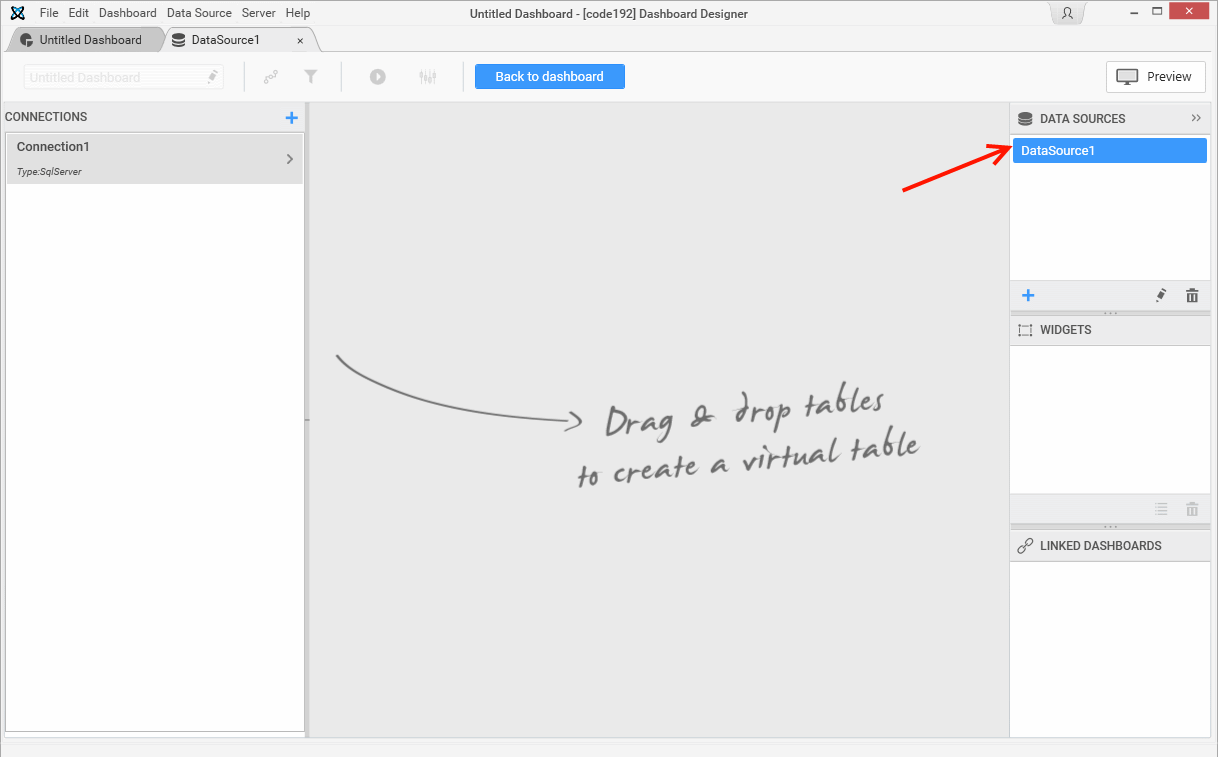
The Data source was created as shown in the screen below.
Important
If you create a Data Source from two tables or two connections you will have to merge data. Please see the section
joining tablehere